Ask The Dirk: Setting up the Logs and Rounds

Setting up the Log and a Round in our Logs & Rounds module.
First kindly note that we have transitioned the old ER Log module into Logs and Rounds and with that into a module that can be used by any department or for any purpose with the necessity of having a rounds feature.
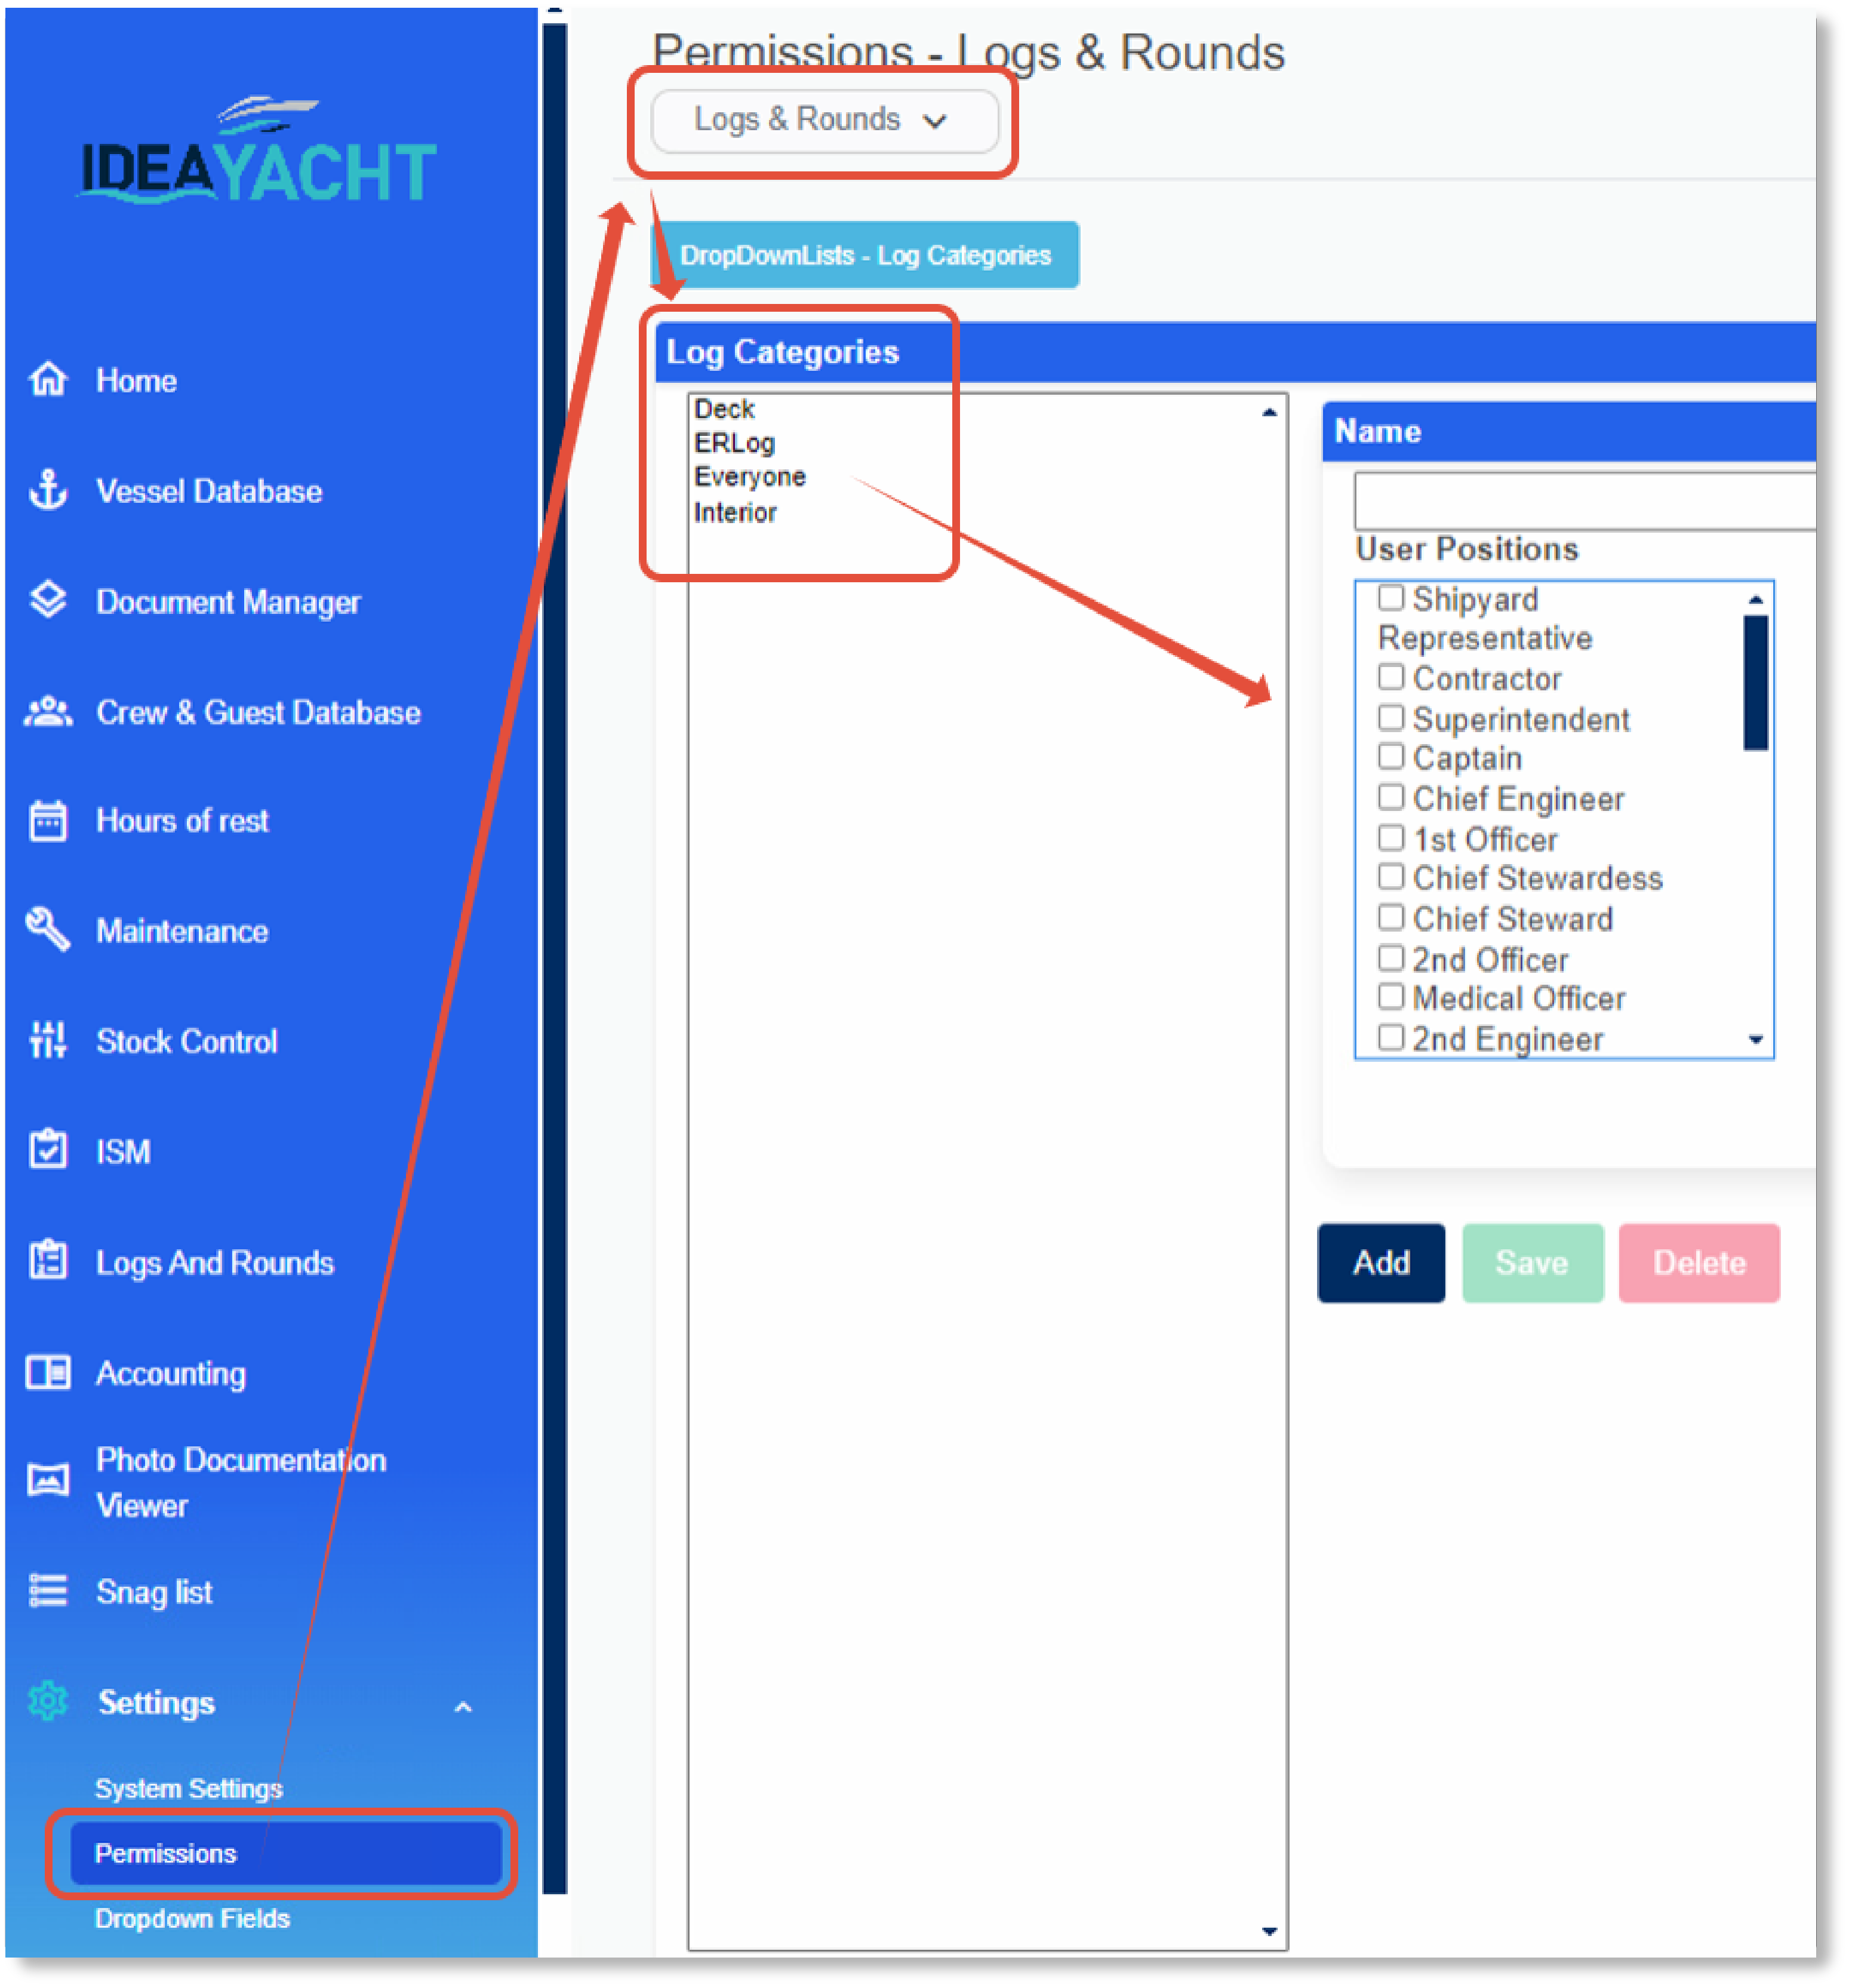
To accomplish this we have added the Logs&Rounds categories for which you can set the permissions per position:
These categories can be added and managed here, make sure you have all the categories you need added here with the necessary position assignment:
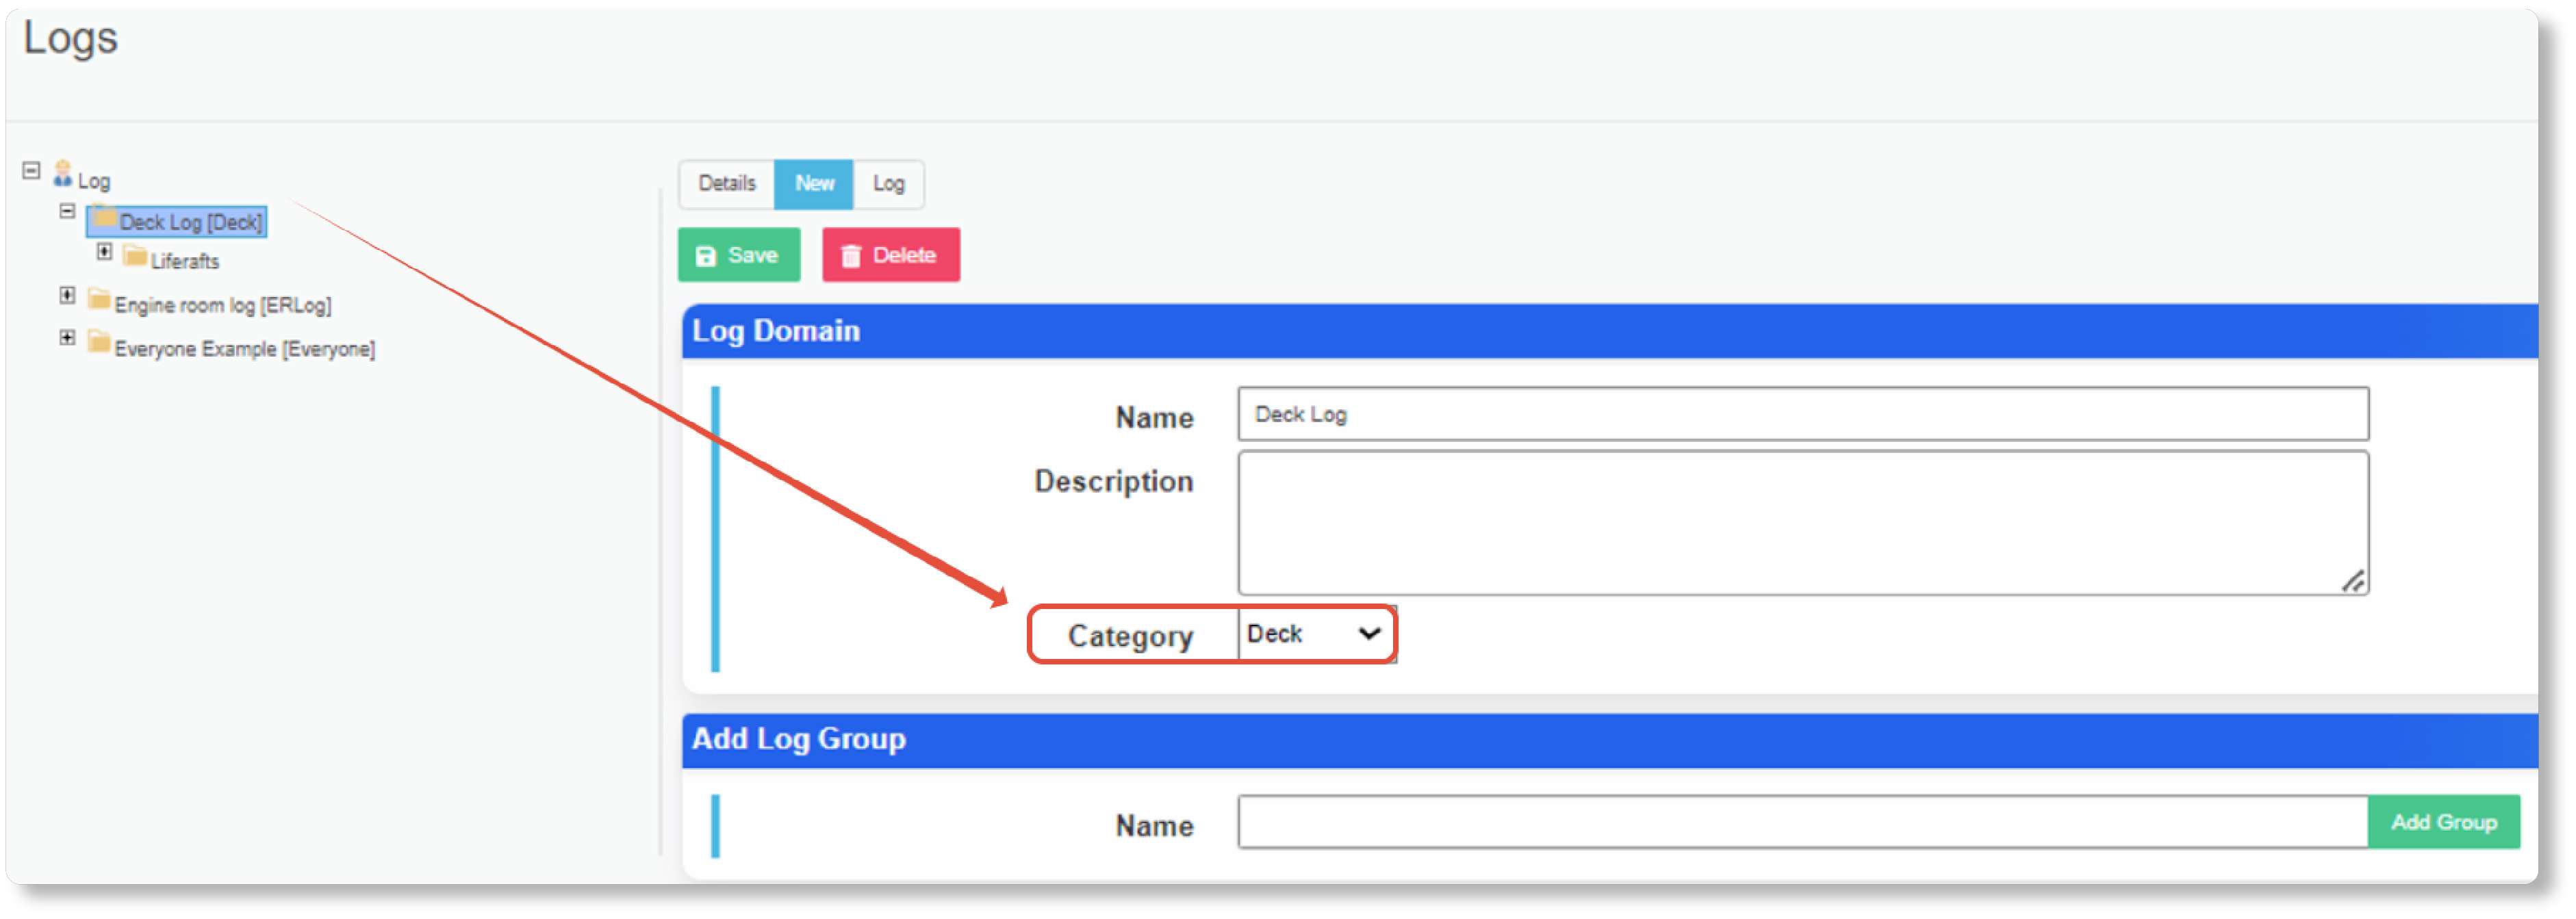
Since entry points inherit their category assignment from their location in the Logs tree view, with their domain having set a category, and also since you can set a category for a round as well, its important that the positions meant to work with these rounds have the permission for the corresponding categories.
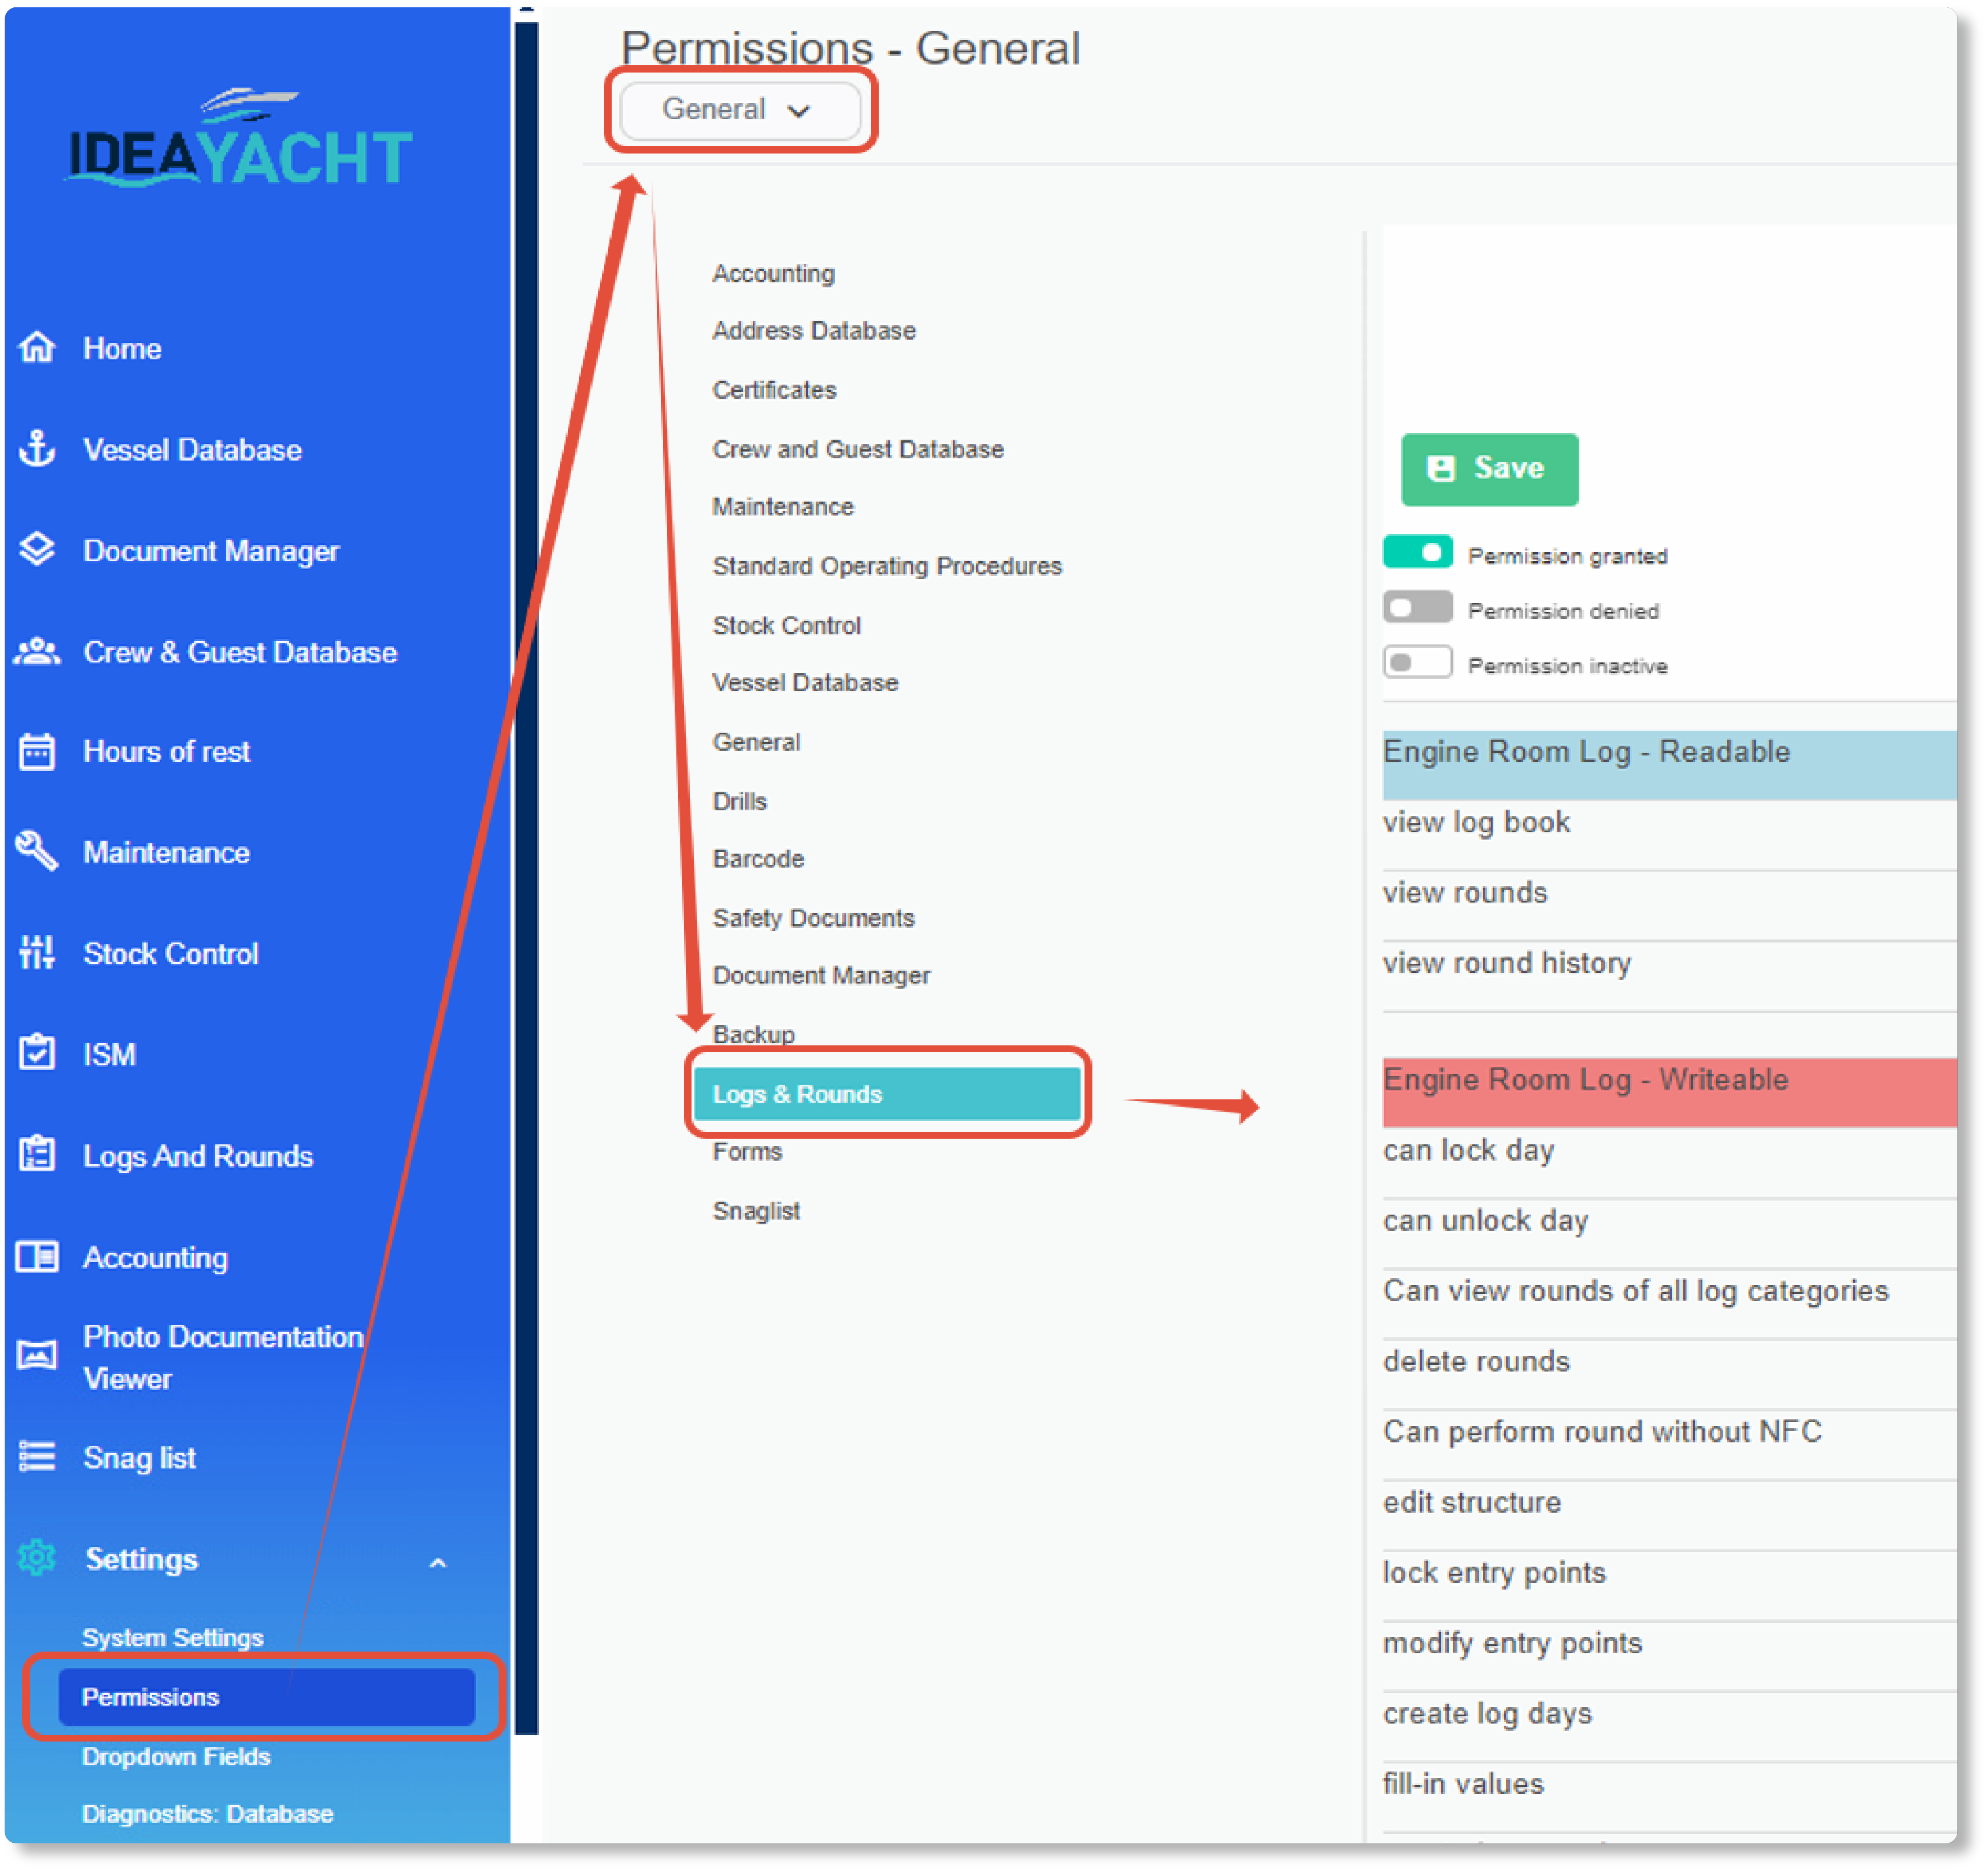
Mind, there are also general permissions for the Logs and Rounds module here:
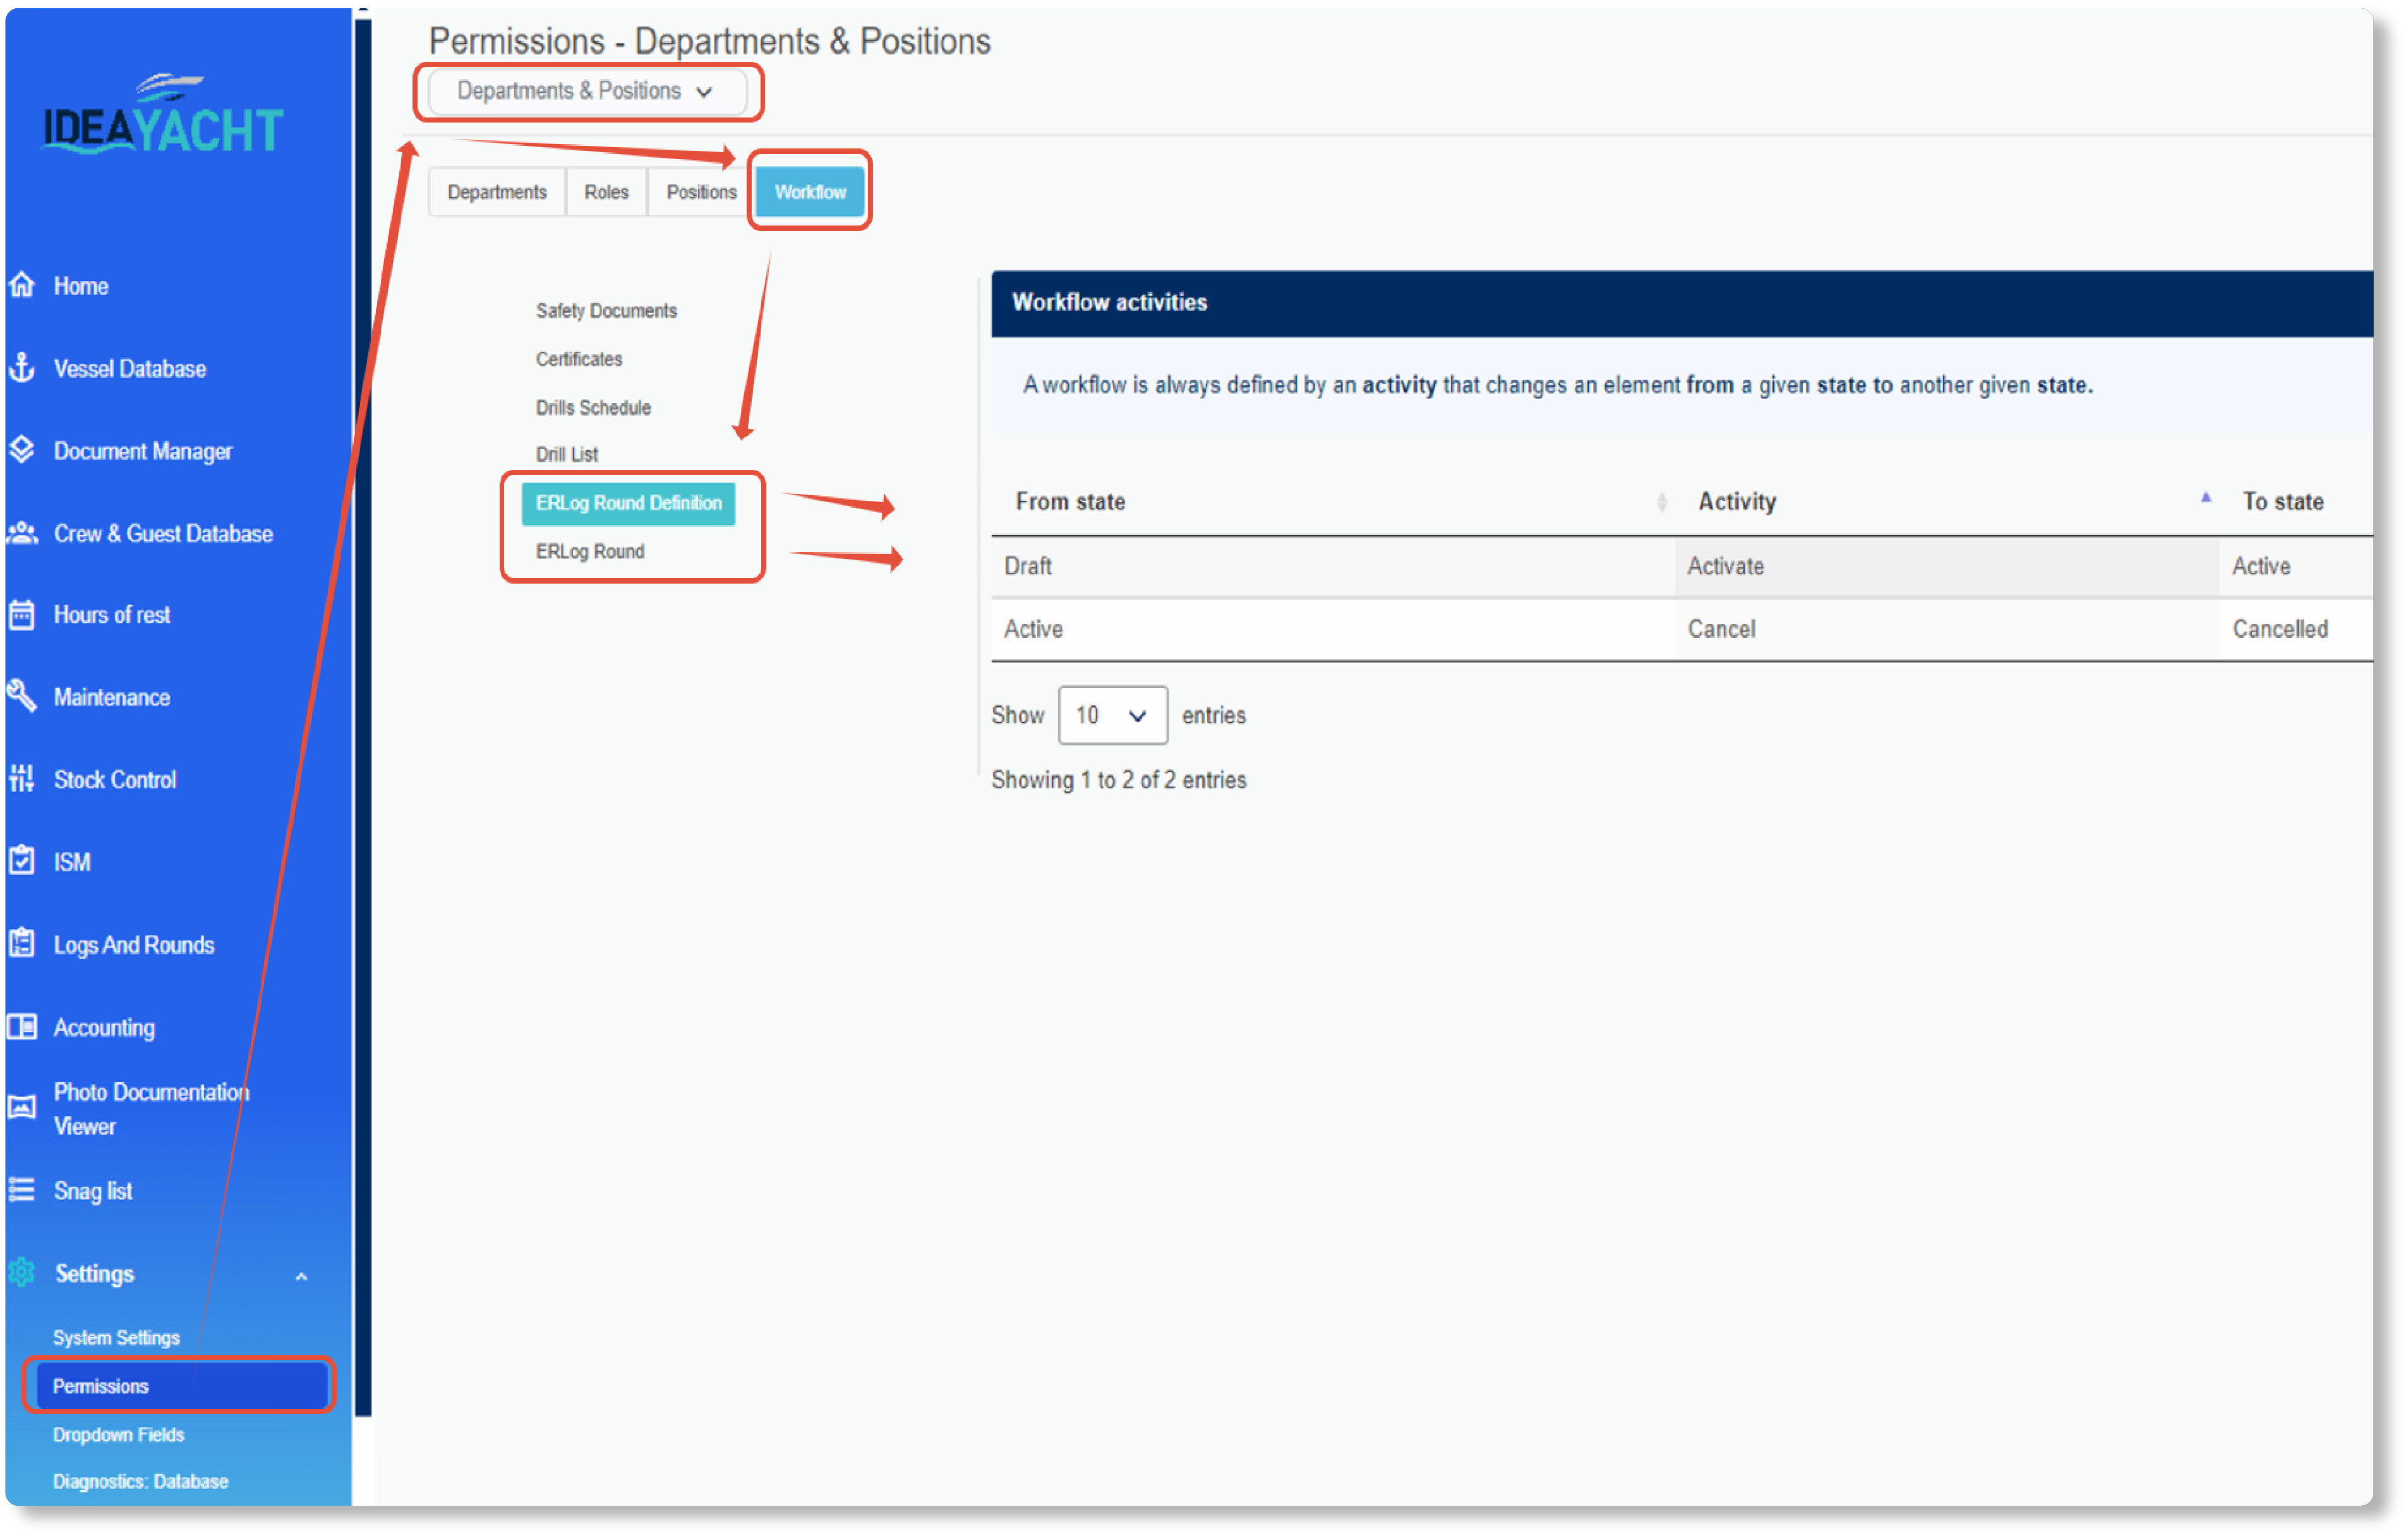
And workflow permissions for running rounds or generating rounds here, though usually and in the most cases these do not need to be adjusted.
Now that you have the basics for the involved permissions lets move to the Logs page and add some data.
First you need a new domain and its category:

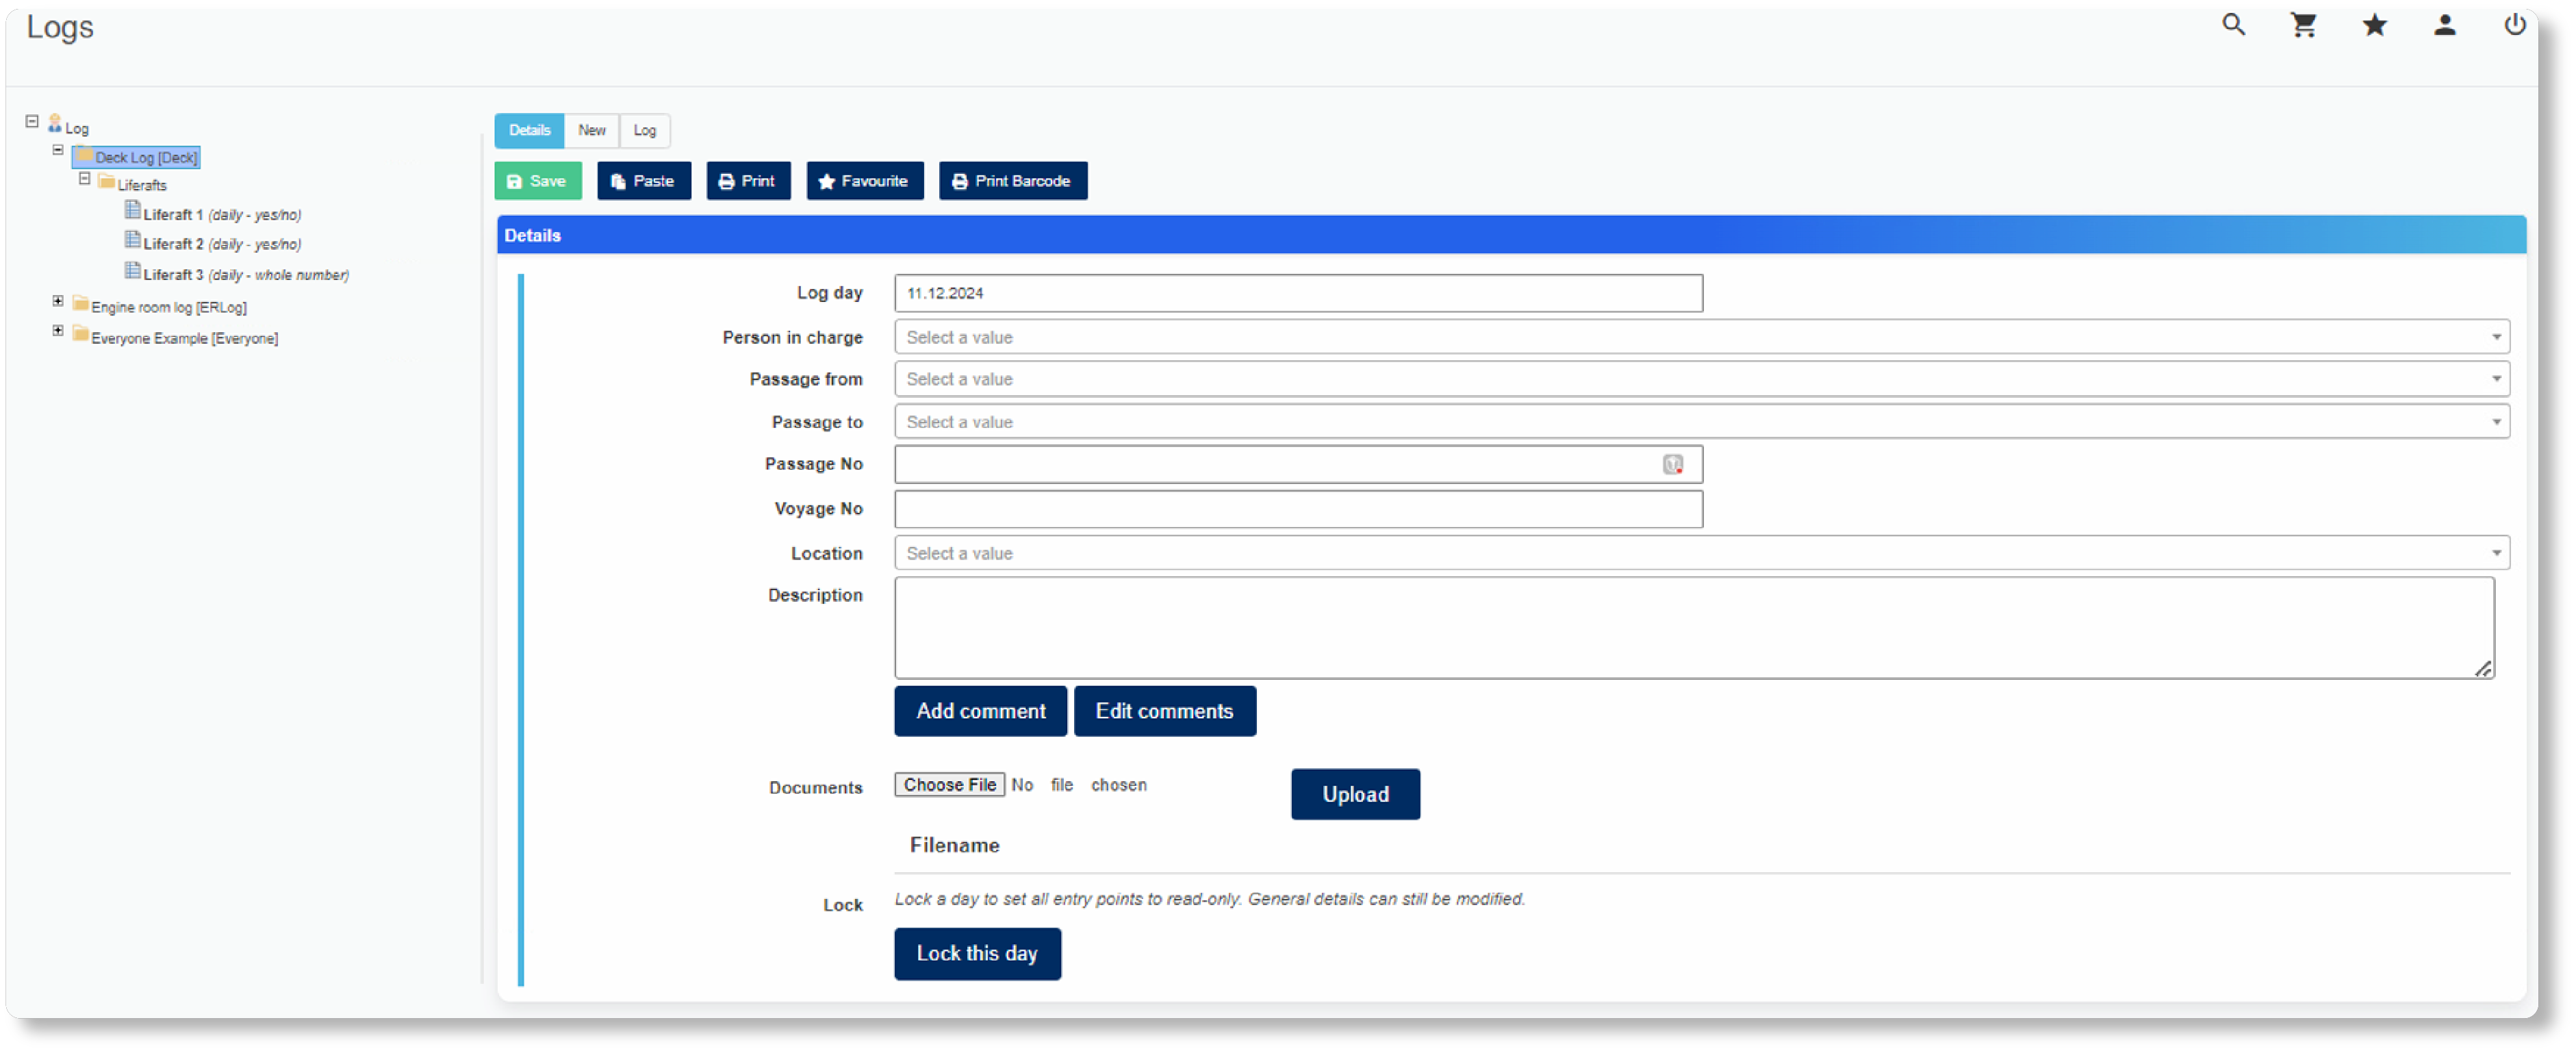
The domain is also the area where you can enter daily logs:
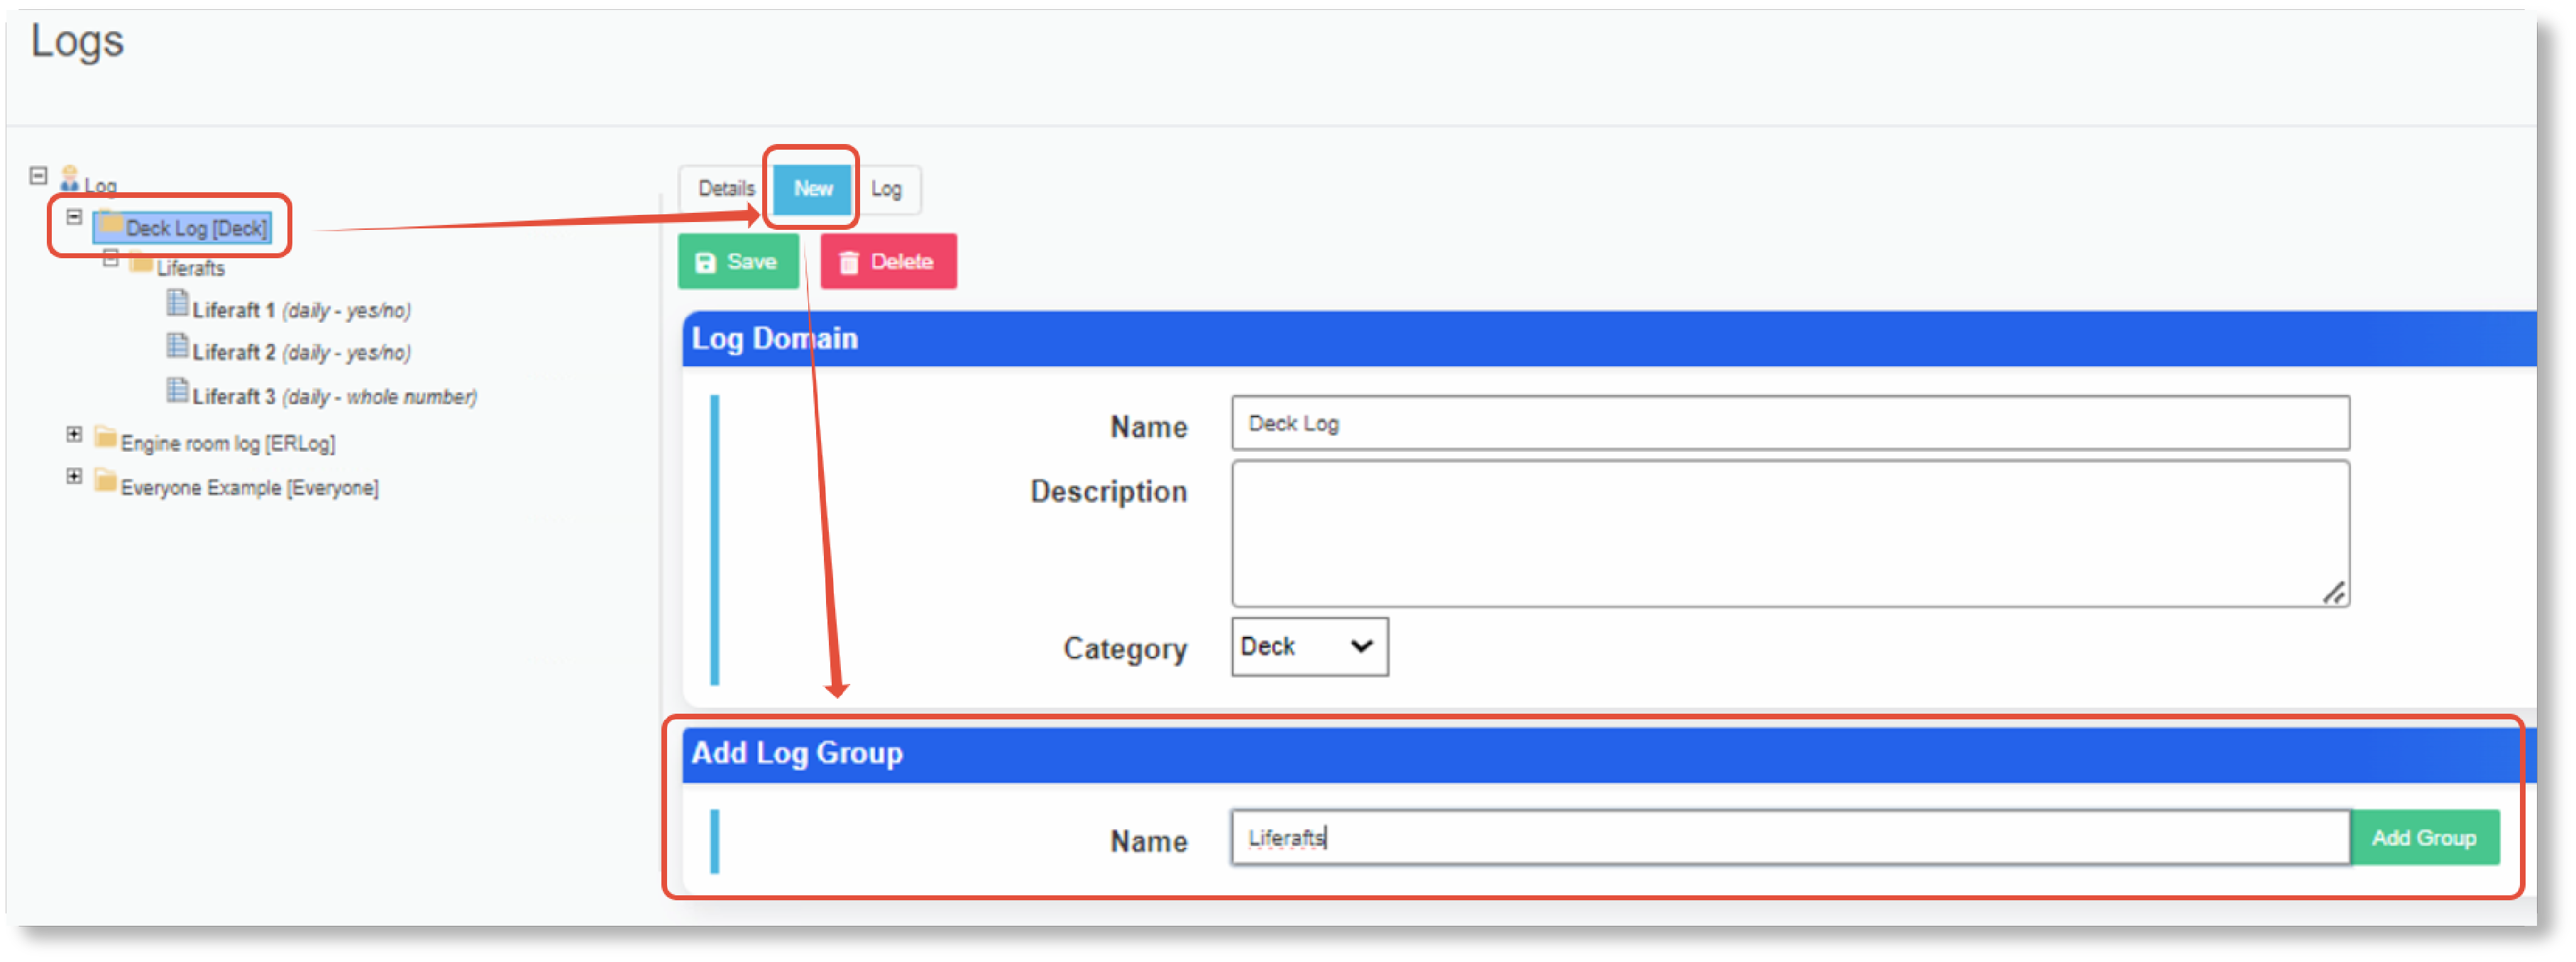
Now add a new group in order to categorize your entry points for this domain:
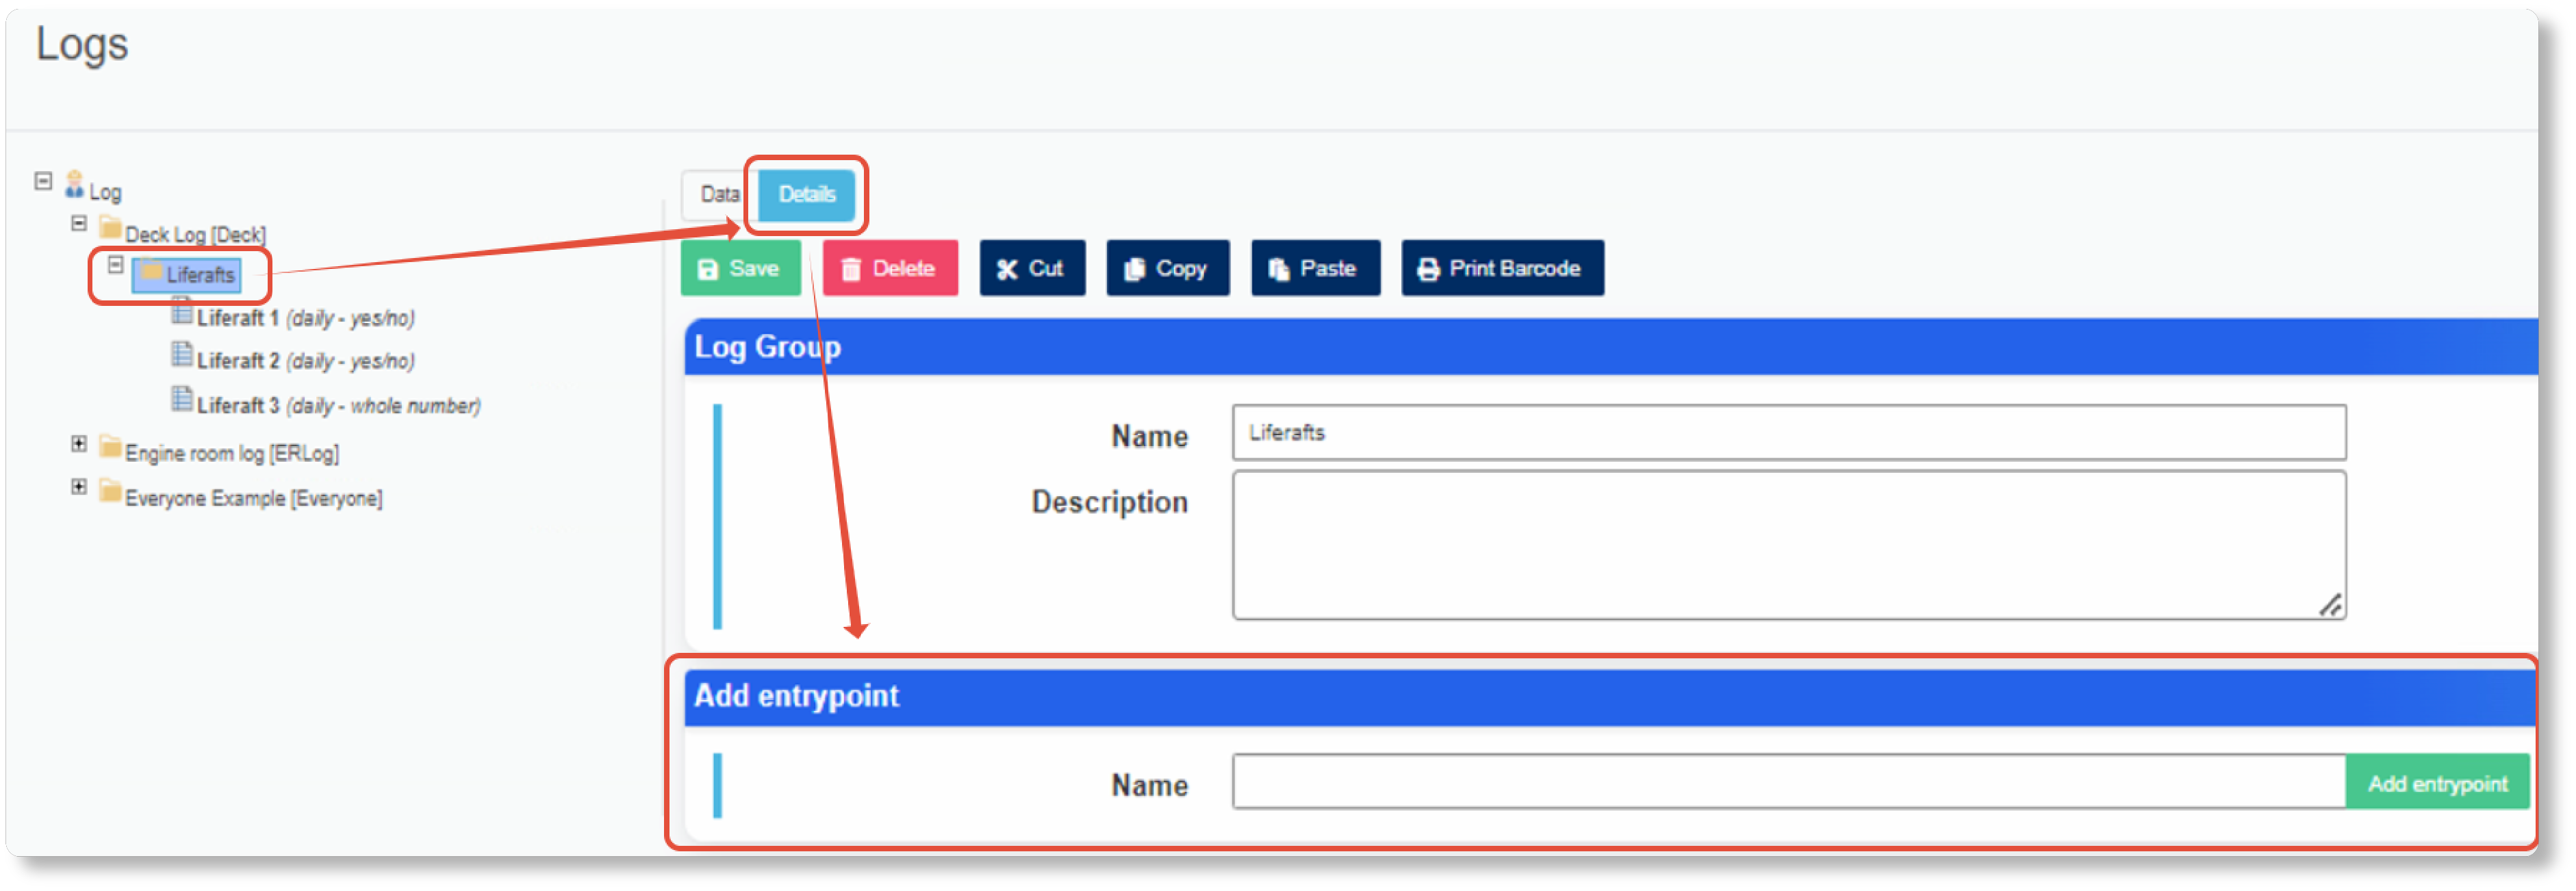
Now switch to the group and add the entry points:
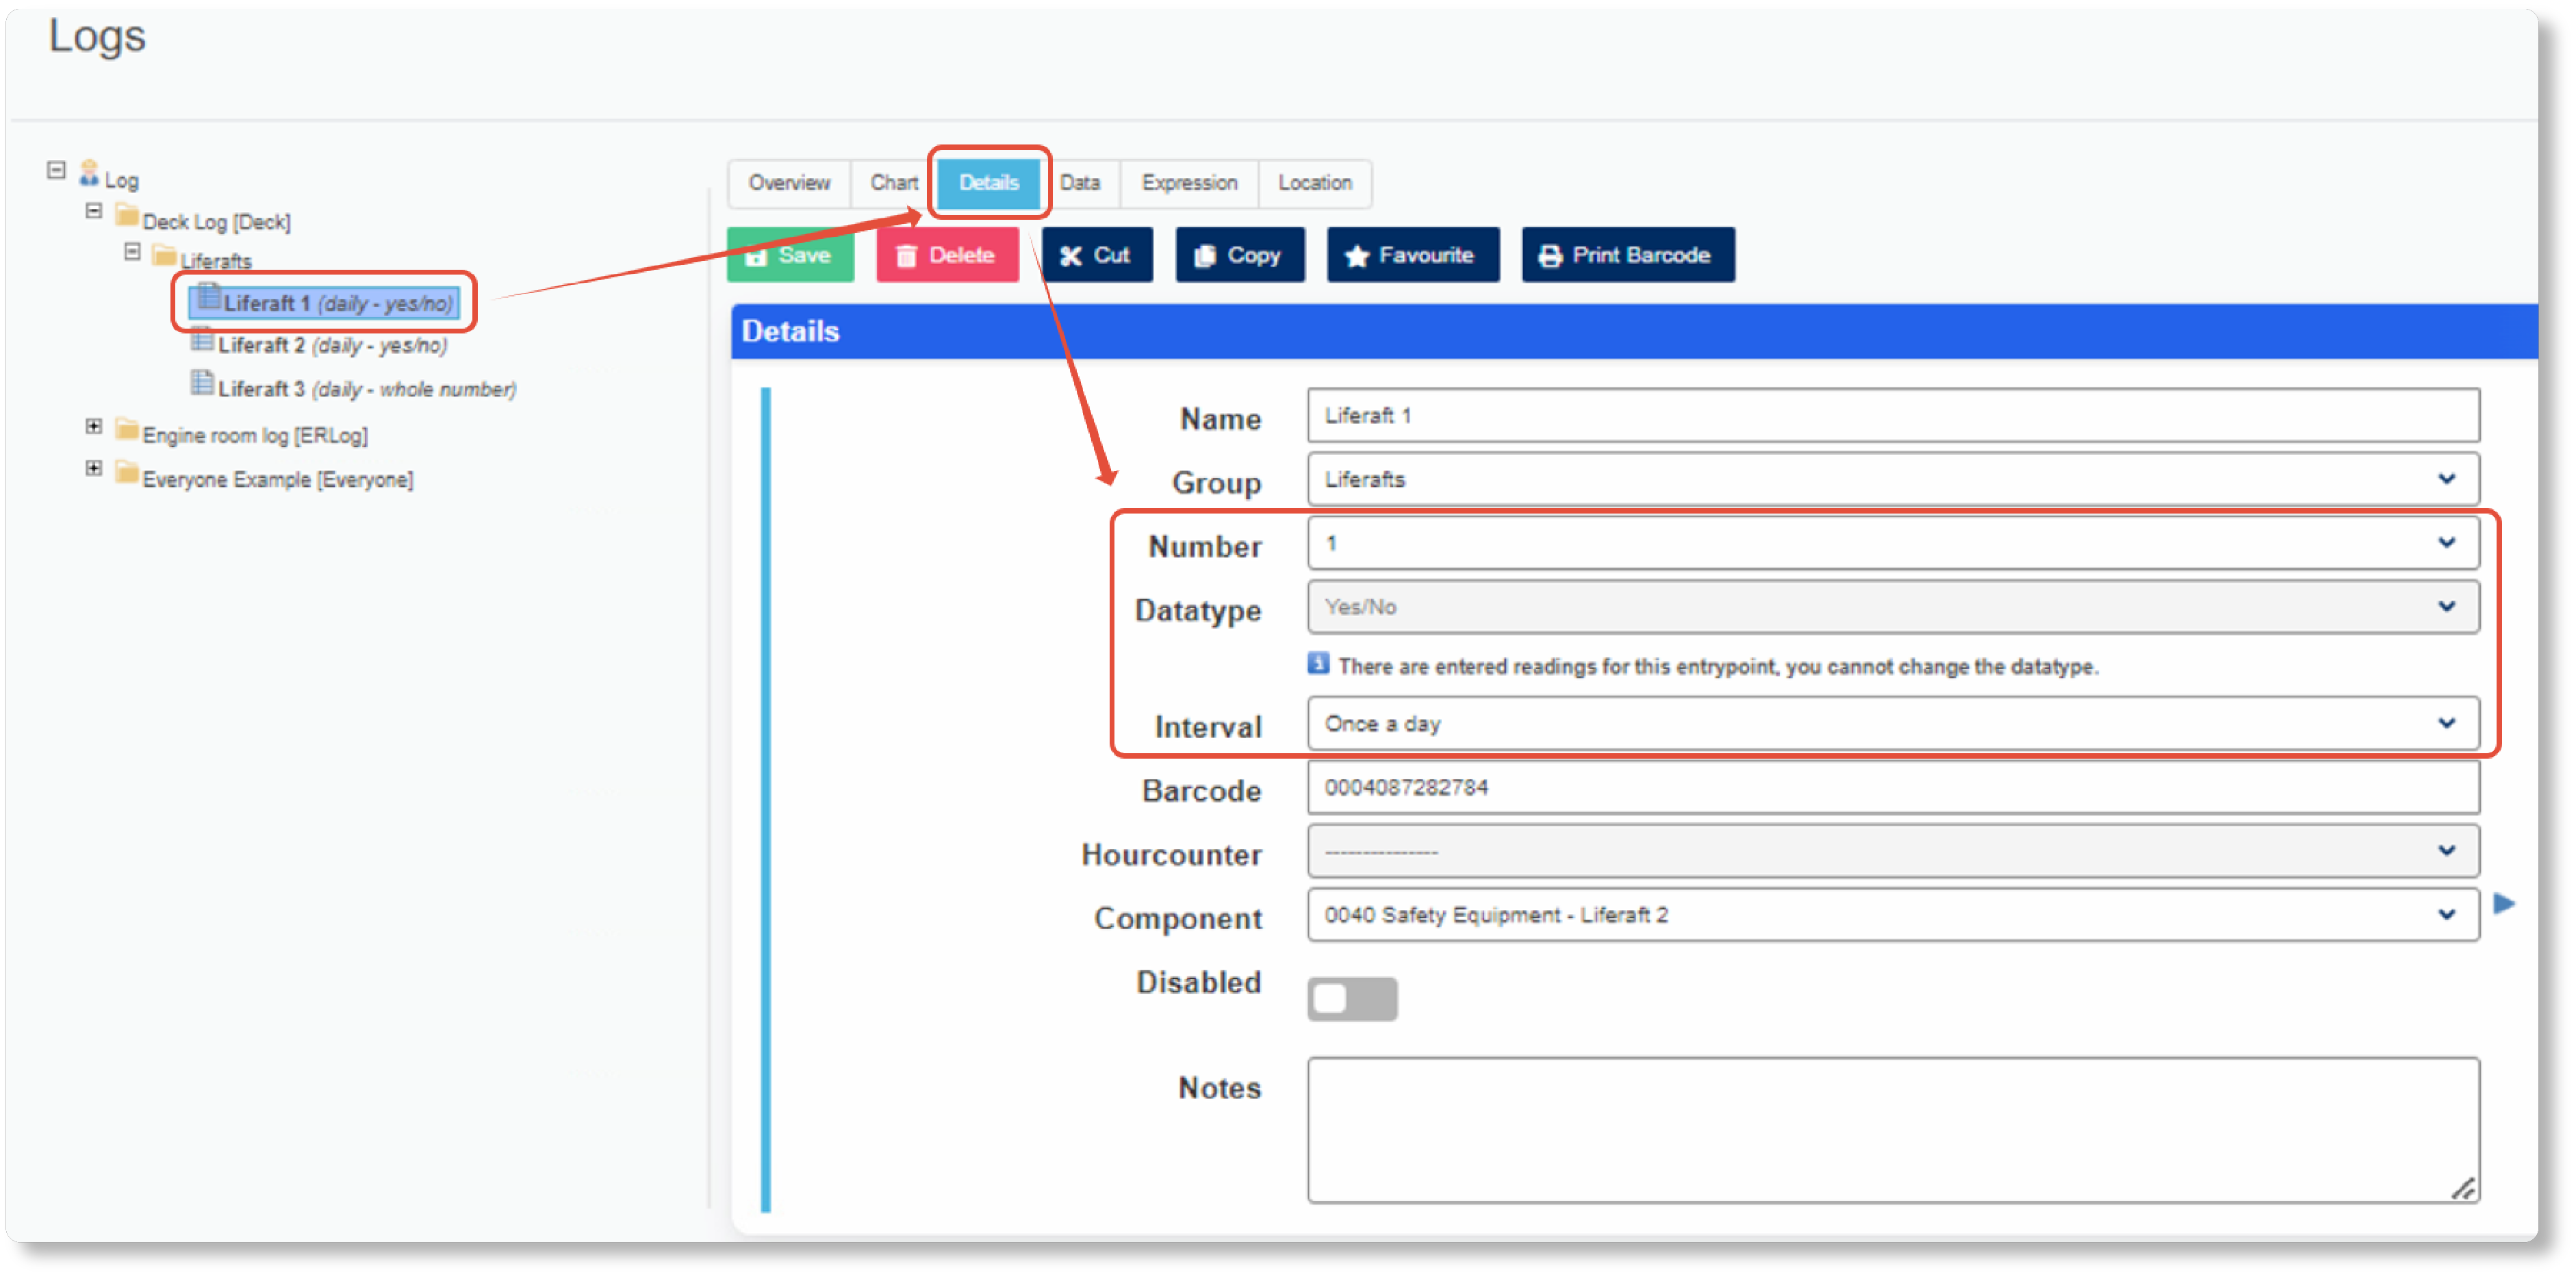
Please adjust your entry points so they are having the data format your need, set its order number and interval.
Note that you cannot change the datatype any longer once you have added values for this entry point.
With the entry points added lets now move to the rounds page to generate a new round.
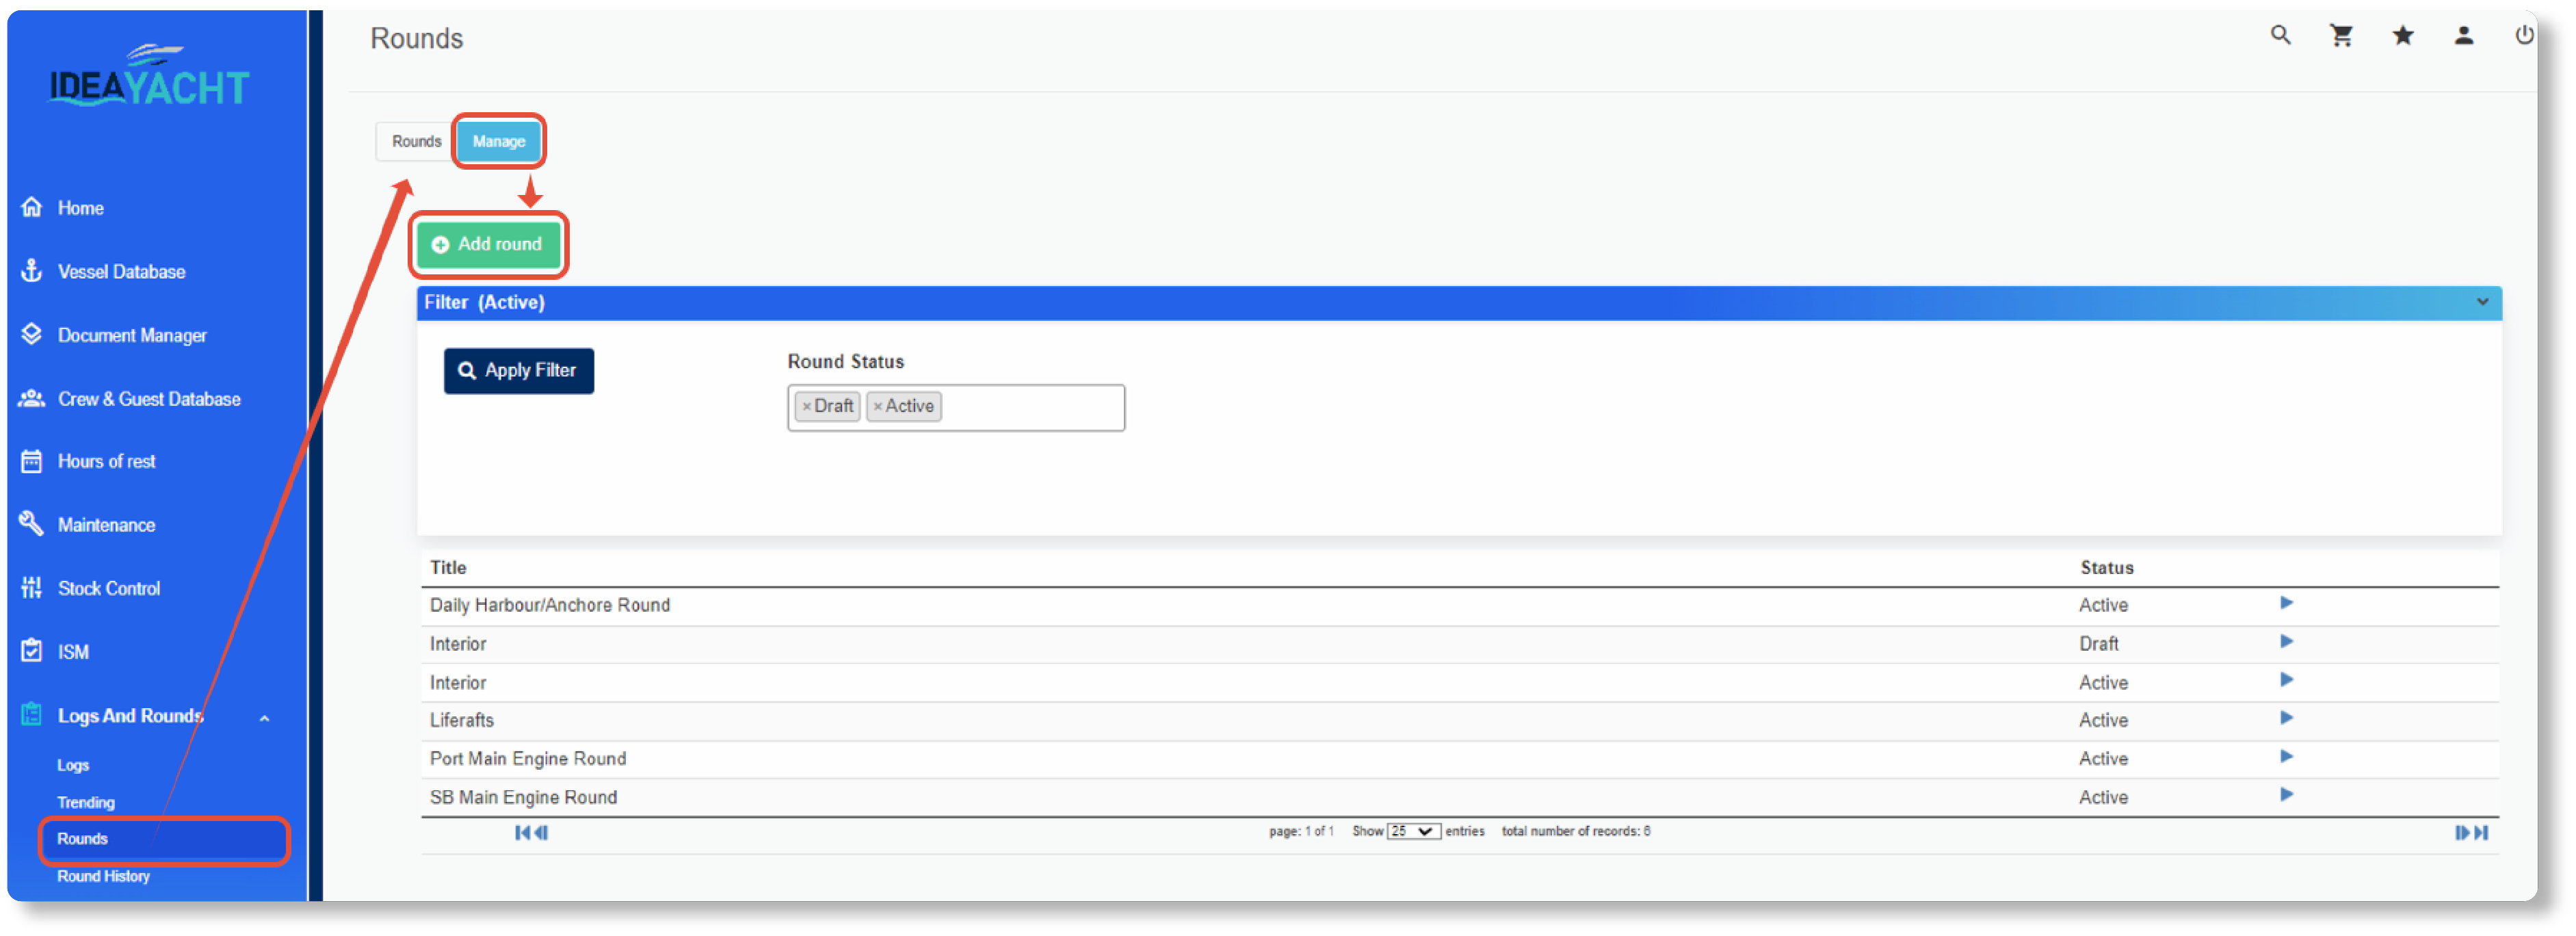
Navigate to the rounds management page and press the “add round” button:
Please enter the necessary details and category you want to use.
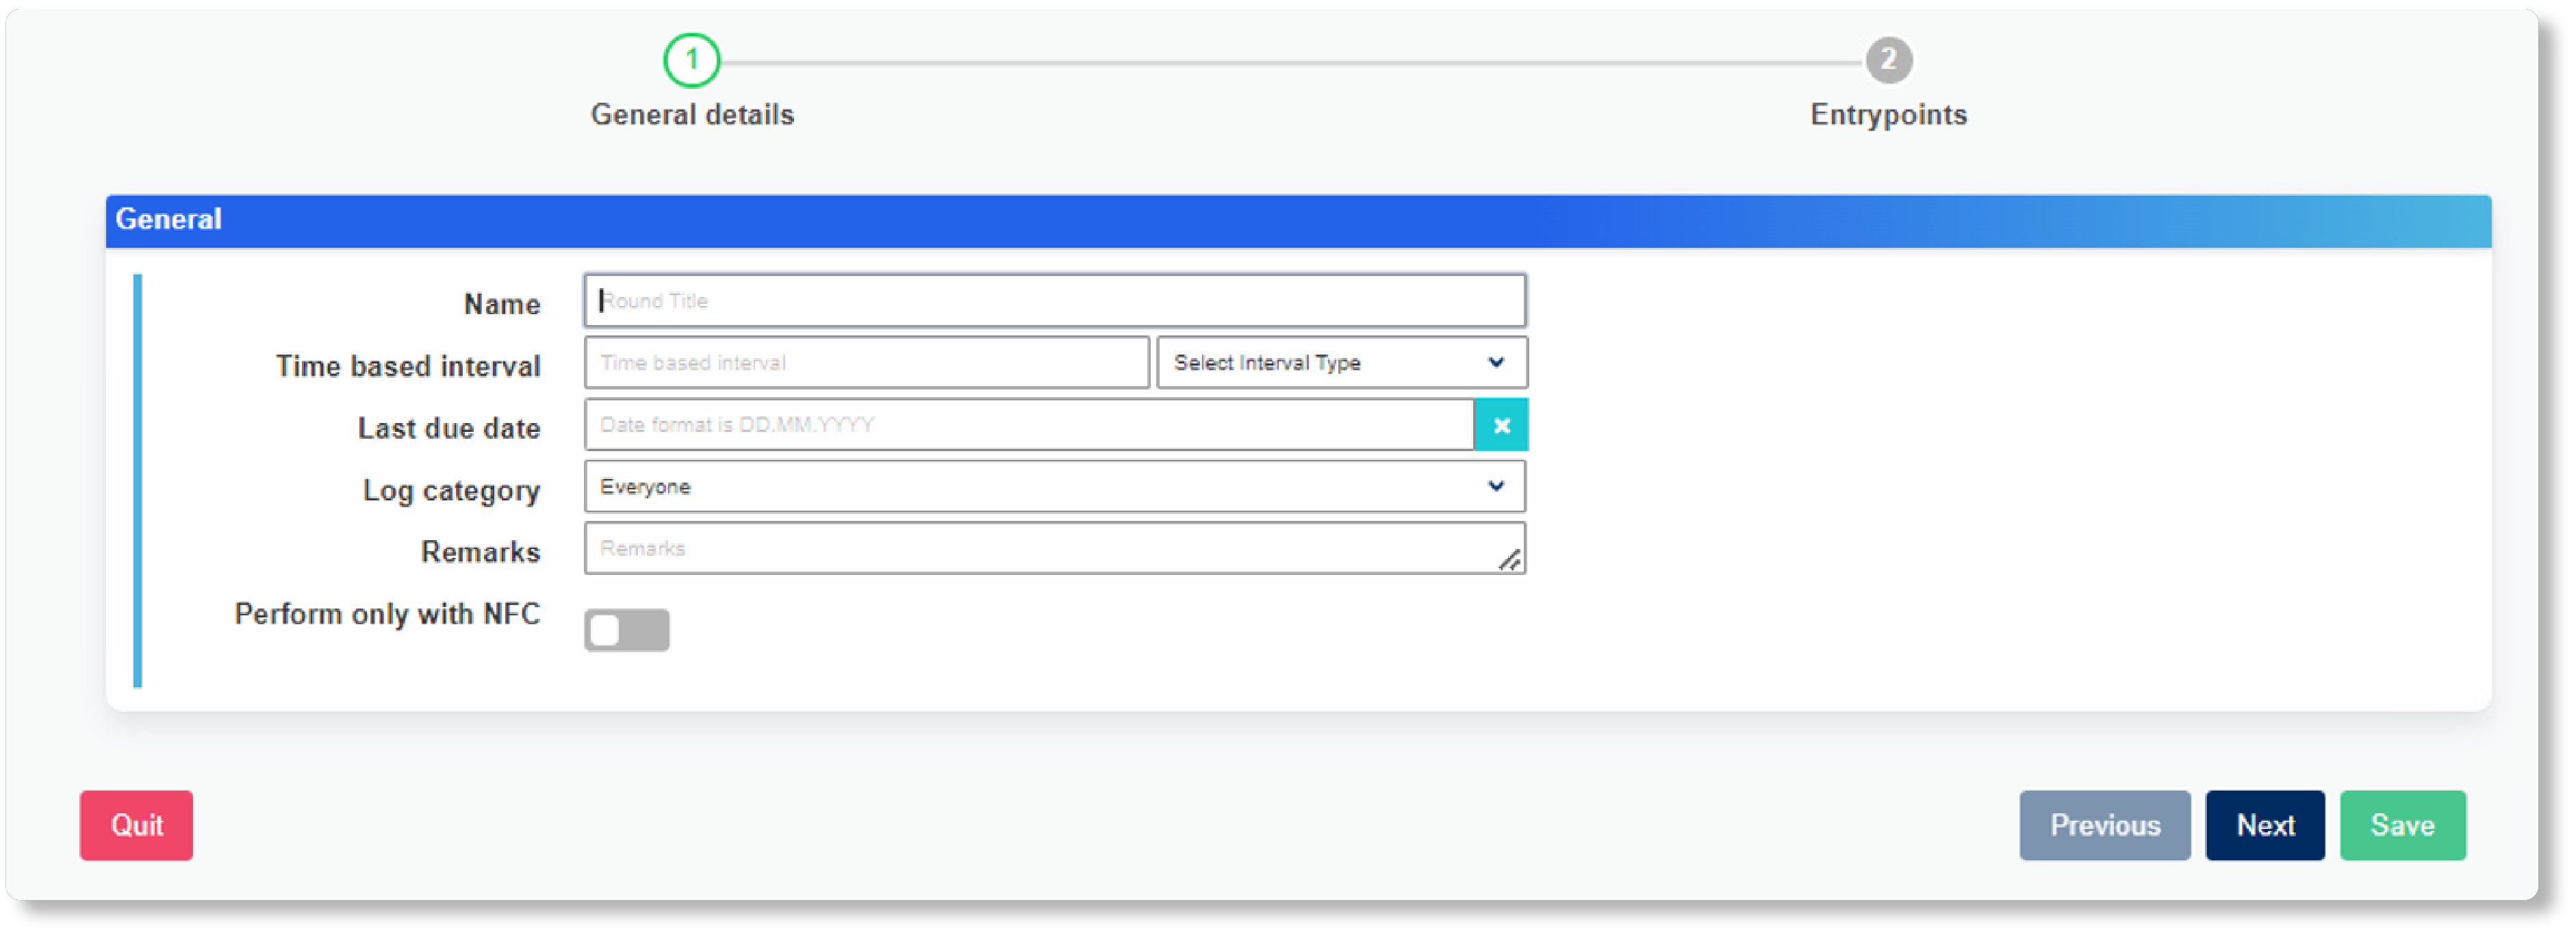
Proceed to the Entrypoints by clicking the Next button.
You can move a complete group to the round by clicking the small + symbol on the left page or manually drag and drop the entry points from the treeview into the right selection page.
By using the – symbol you can remove the group from the selection or you use the trashcan symbol in the right page. By using the up and down arrows in the selection page you can change the order or your entry points.
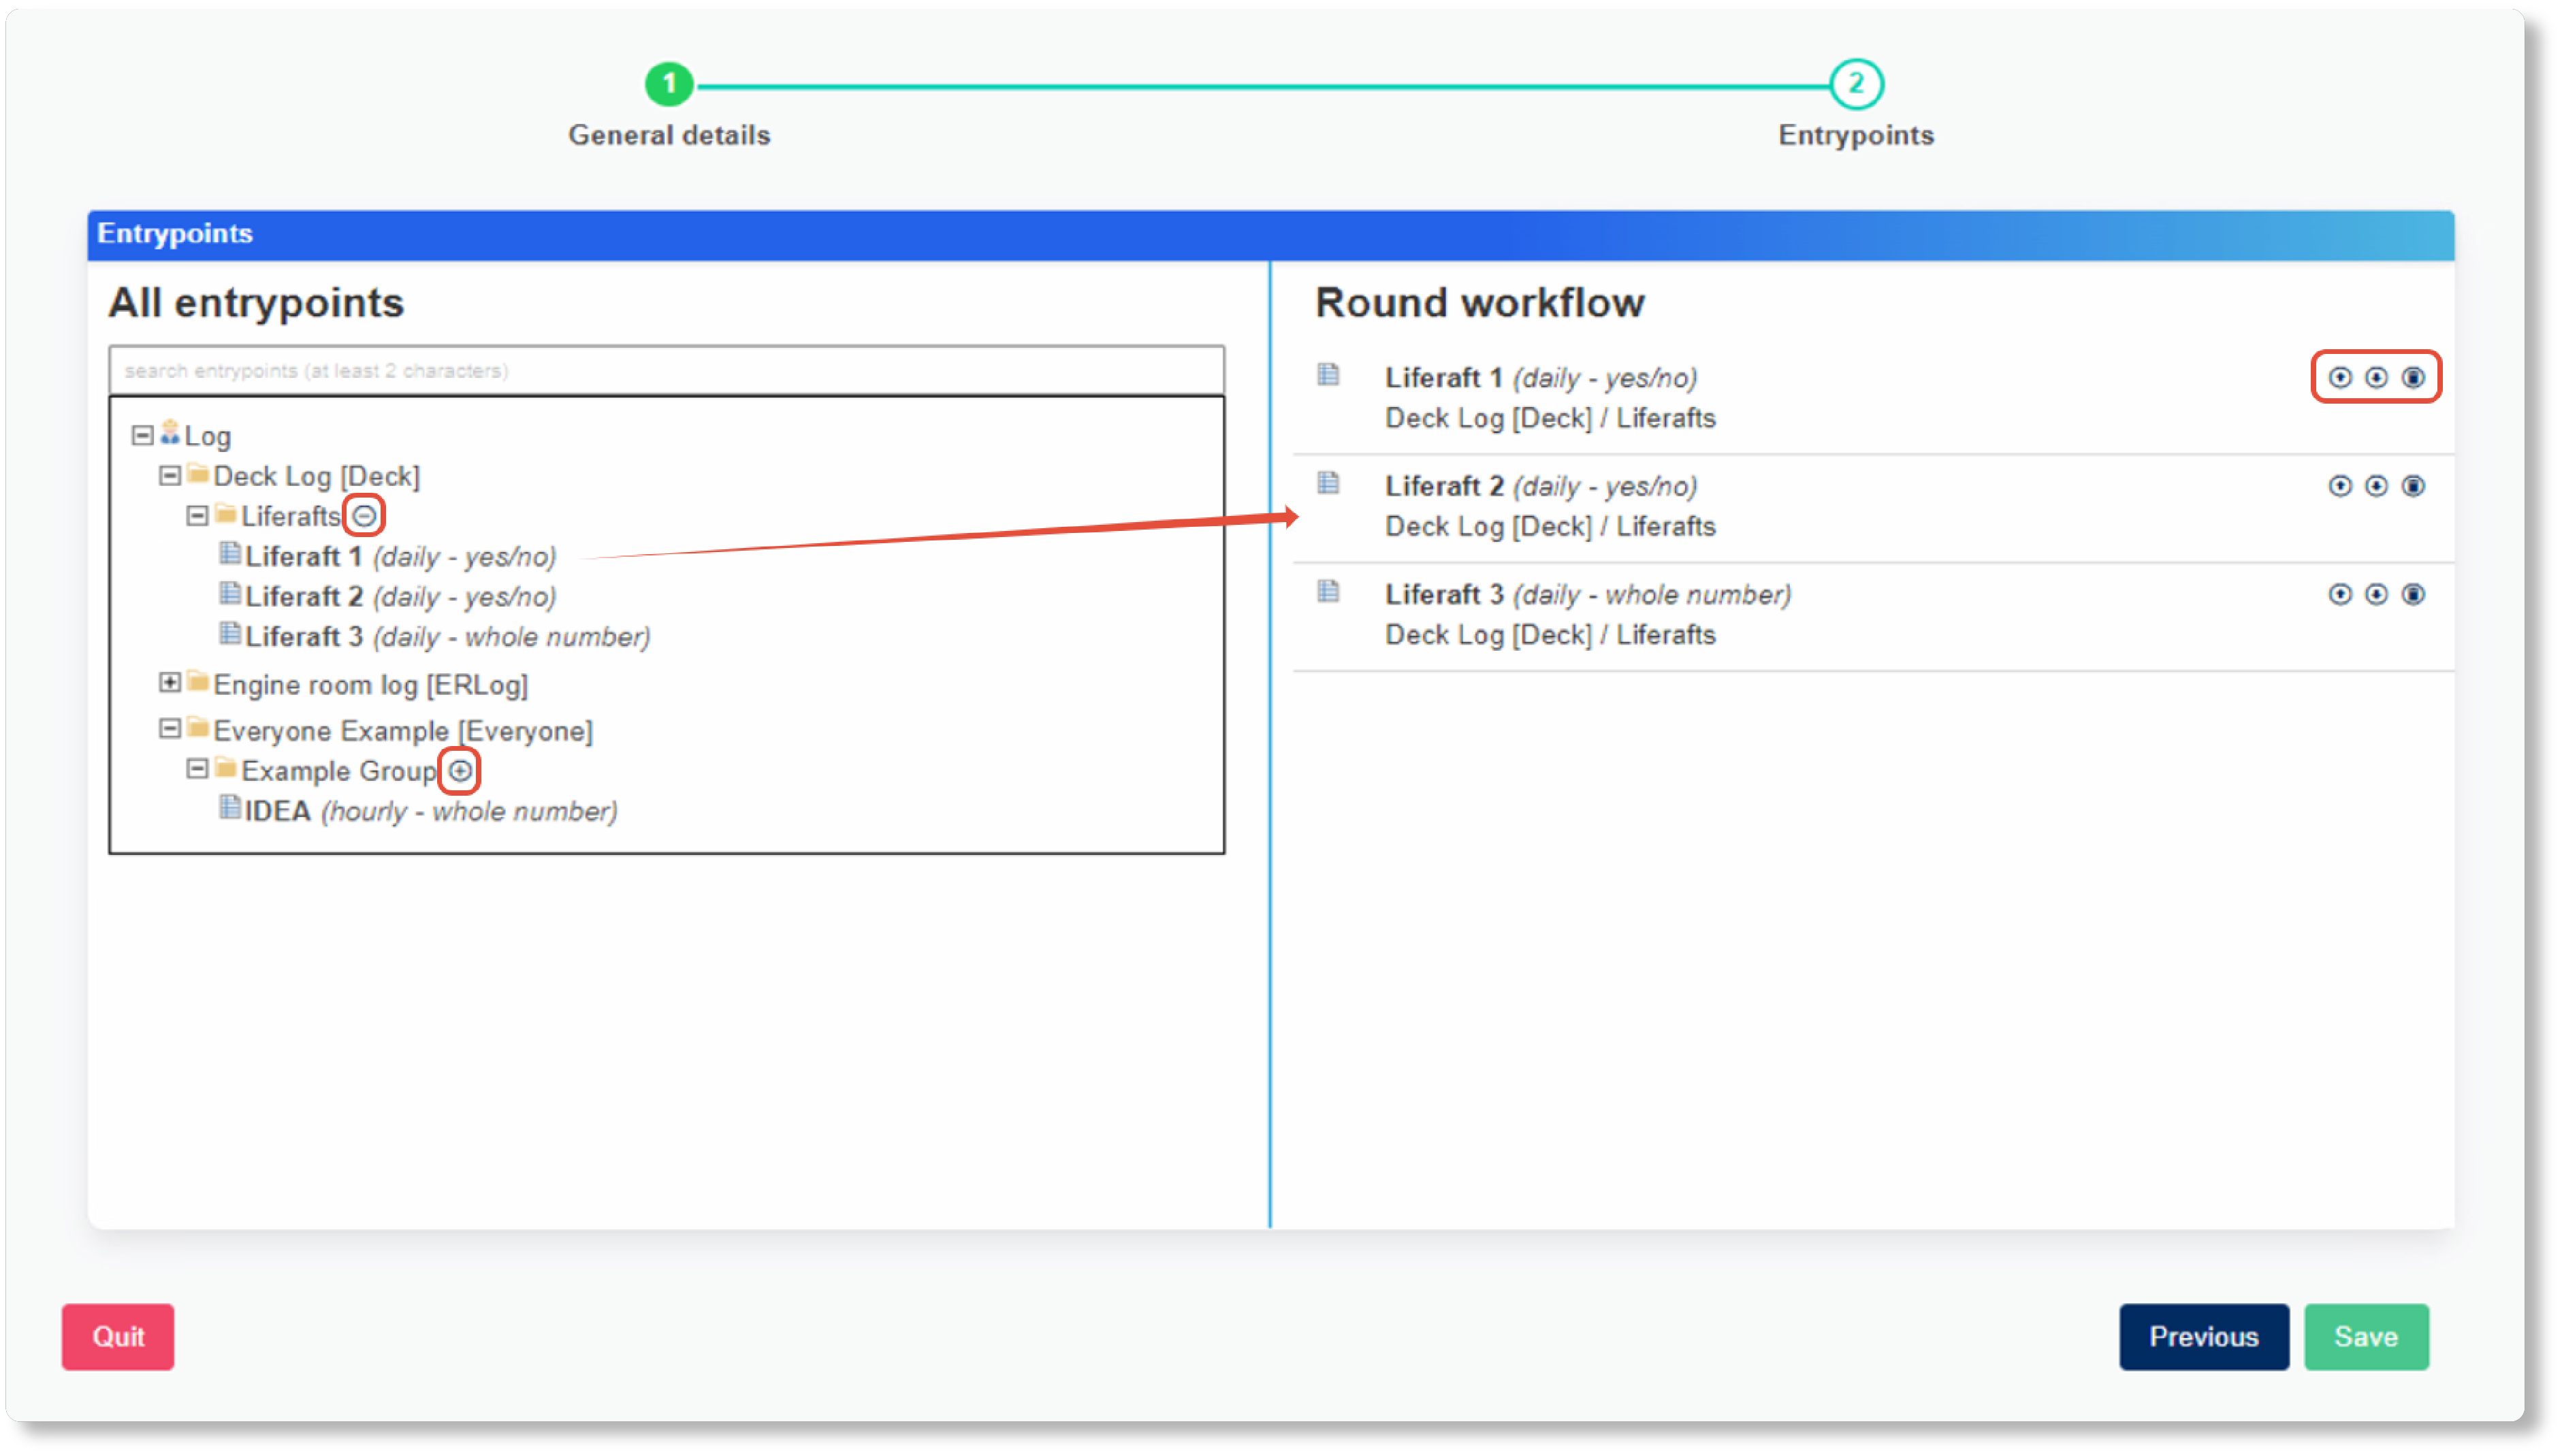
Remember that the entry points must belong to a category that can be read and entered by the user/position who later runs this round.
Once you have all entry points in your round please click the save button to finish the generation of the round.
Note that a newly added round is not automatically activated and still in draft mode.
To active it press the activate button at the top right bar. This could have been the cause for your frustration.

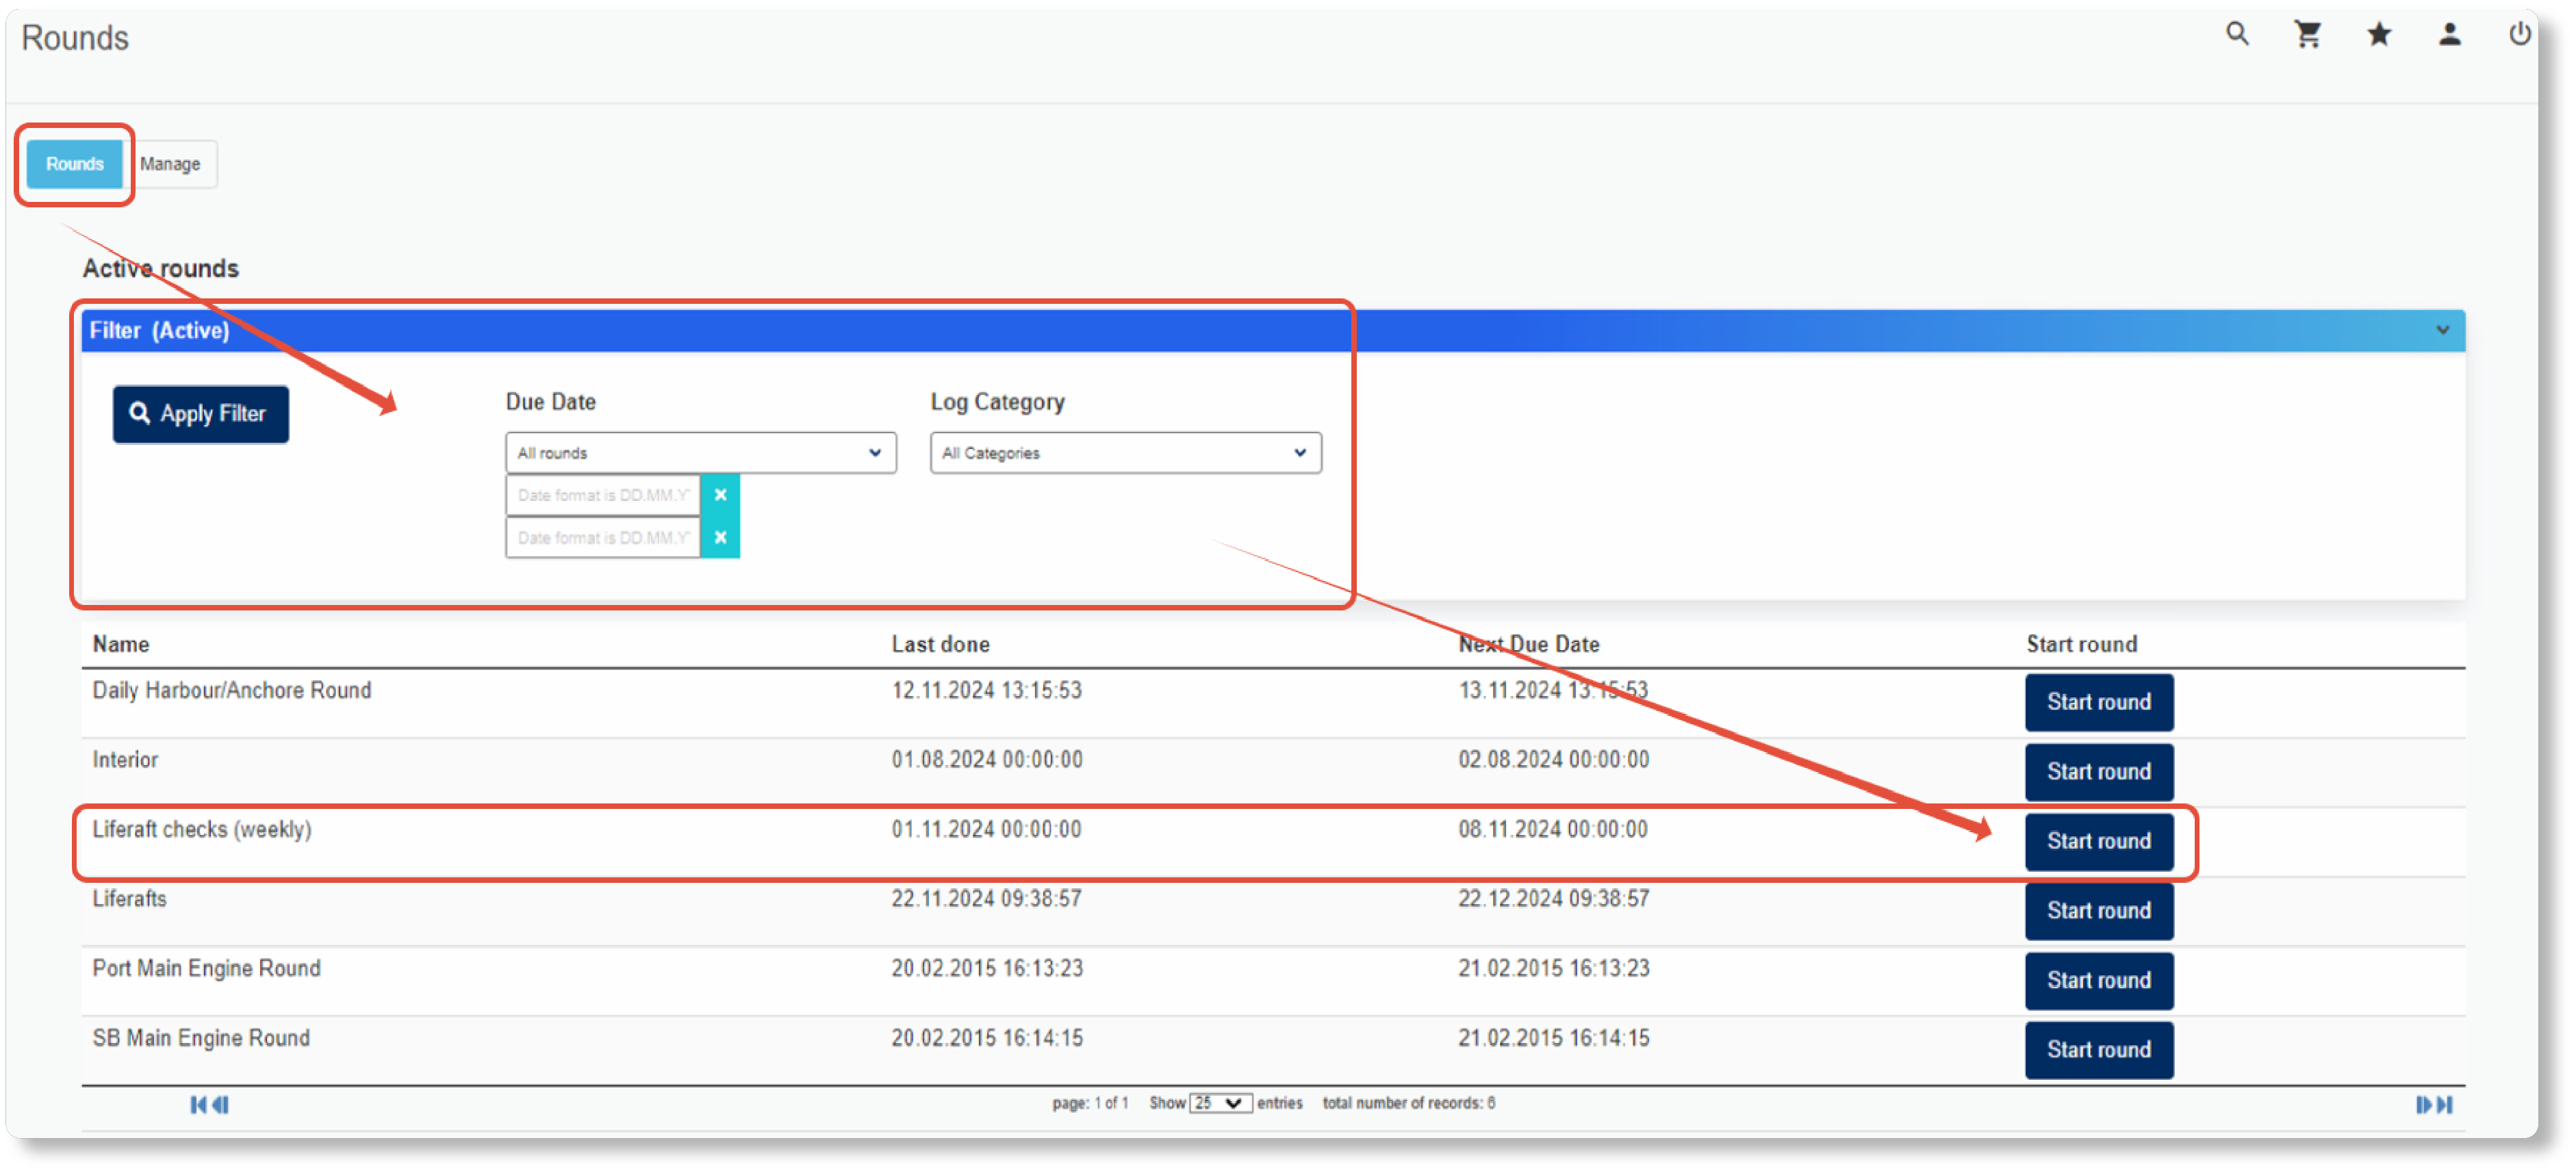
Once activated the round is ready to be used and will be displayed in the Rounds page, remember to verify if your filter settings match the rounds you need to perform!

Dirk has been working at IDEA since 2010, and is one of our veterans with 4,695 tickets solved in the last 2 years alone. Dirk is on hand to give expert support! This column answers your most common questions!